Design of the Month · October 2009
-

"Heron"
I have been a Glass Eye user since the days it came on a 3?" diskette. While a good program then, it pales in comparison with Glass Eye 2000. Windows and then Vista pushed me into buying the later version, a move that I should have made earlier.
I tend not to do a lot of original designs, unless they are modern free-flow or geometric designs. So the feature that allows one to import a background, then make an outline of the lead lines and then delete that background so you are left with only the outline is for me the program's most useful feature.
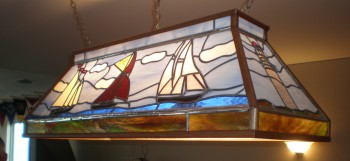
My last project was a stained glass billiard table light in a nautical theme, made for my local yacht club.

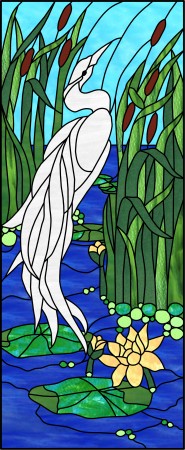
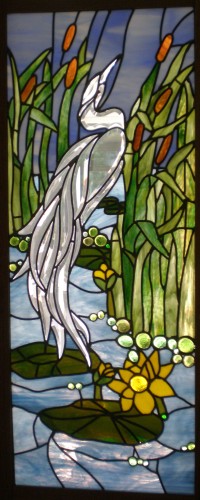
We have a door with an 18" x 55" clear glass panel that goes from our bedroom to our deck. My wife asked that I make a large panel to fill most of that space. I looked through the stock patterns that came included with Glass Eye 2000 and the "Frog Pond" design in the CKE collection fit my needs. I liked it and it was the right shape. However, I wanted to include a bevel set of a 31" tall heron that I purchased from Delphi instead of the frog and the dragonfly. It was fairly easy to modify the basic pattern.
My first step was to scan the cartoon of the heron that came with the bevels and create a JPEG file. Unfortunately, as the heron was 31" tall and my scanner could handle only 11" at a time it took three scans to make the JPEGs. Then I imported the first scan as a background and copied the cartoon. I did the same for the other two scans and stitched the three outlined scans together — first with the Sticky feature off and then adding knots to connect the parts. Once I got my outline together I used the Resize function to make my outlined heron the correct size.
Next came the real fun. After sizing the frog pond to fit my window, I deleted a box a little larger than the size of the heron from the frog pond, where I wanted the heron to be inserted. The color disappeared by any lines that were broken. Then I copied and pasted the heron into the frog pond pattern, off to the side. Then, with the Sticky feature off I selected the entire heron and dragged it into my location on the frog pond. Once properly placed I turned the Sticky feature on and connected lines. If I couldn't color an area I knew that I needed to add knots. Then I changed the major colors from an amber sky to blue and from green water to a different shade of blue. I also added another water lily.

Since the beveled heron could not be adjusted, I used it as my starting point. I put the heron together first on the new and improved frog pond, but I couldn?t get it to exactly match the cartoon. One makes do. Working from the heron I cut the glass to finish the close, left edge adjacent to the heron, then down to the bottom, to the right side and up, working from the heron out to the edges. I did a lot of grinding and fitting. I don't cut enough glass to consider myself skilled at cutting glass well. Various sized glass nuggets were used for the bubbles. I just tried to get a fairly tight fit with the different shaped bubbles. I decided to make the panel a little taller. As there were no real height constraints, I cut the glass pieces on the top and bottom a few inches longer than the cartoon.
There is a ½" zinc frame around the outer edge and lead came for the rest, except for some bubbles that were foiled. I decided not to use any rebar since the panel is only 18" wide and attached to a no-sag zinc frame at many points. In deciding on glass, where I used a more expensive glass it was really worth the money. Considering the work that went into to panel, the more expensive glass really pops compared to the cheaper glass, and was a very good choice.
I purchased wide stained glass framing stock and built a frame that matched the opening of the window. This left about a 6" opening at the top and bottom of the window. I wanted to fill it in with two pieces of colored glass while my wife wanted it left open. It is open. To set it off, the door was painted green, which required the wall opposite the door to be painted the same accent color and of course, if your do one wall, may as well repaint all of them. Glad it stopped with one room!
~ David Pine
About the artist
David started working with stained glass about 35 years ago when his wife signed up for a beginner's course and was unable to attend, so he went in her place. As a home hobbyist, he feels fortunate in having a large space that can be dedicated to stained glass.
Almost all of David's professional life was spent as an engineer with NASA. He retired in 2001 and now seems to have less time than when he was working. David can be reached by email.
This pattern may be used to make one or more artworks for sale or personal enjoyment. This pattern may be printed for personal use only and may not be sold or given away in printed or electronic form.
Each month we feature a project designed using Glass Eye 2000. Do you have a project to share with the world? Contact Dragonfly Software and your creation might be our next Design of the Month.