Design of the Month · March 2011
-
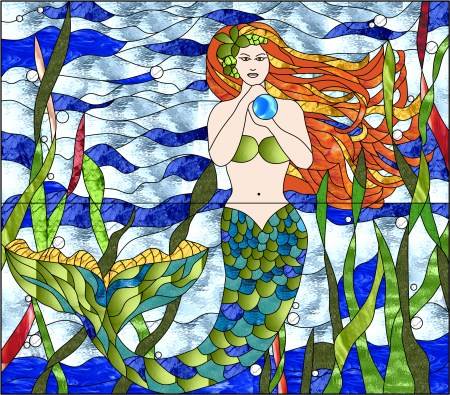
"Mermaid"
My studio, Not Afraid of Color, was recently commissioned to create a custom stained glass mermaid for Mr. and Mrs. Merrow in Brier Creek, North Carolina. Once completed, this one-of-a-kind piece would reside in the couple's bathroom. Joy Merrow loves mermaids and dreamed of having an art piece of a mermaid in her home. With a window this size above the tub, privacy was a huge consideration in both design and the selection of glass. We had a great time creating this piece. Walk through the design and creation process with us and see for yourself how we created this dazzling beauty of seafarer's lore.
The final piece measured 57½" x 50½" ... wow! We faced several challenges creating this piece. Not only did the size test our skills, painting the face was a first for us, and transporting and installing her was quite an adventure as well. In the end, the Merrows were very pleased with the outcome and so were my team and I. I've enclosed a few pictures of her being created, along with pictures of the final product.
Every great stained glass project begins with the design. I worked closely with the Merrows, and over a course of several conversations and after a few design revisions we settled on the final design. Here's the approved mermaid design hanging on the wall of my studio. Notice that each piece is numbered. This is an important step during the process of cutting, grinding and fitting the piece together. When you've got several hundred pieces it's important to have it mapped out where each one goes.
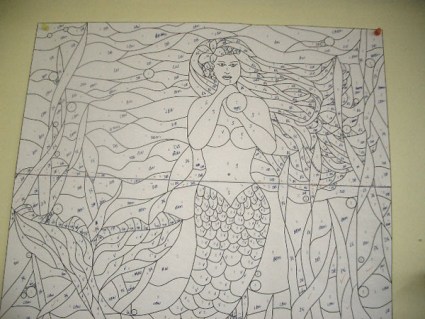
Once we had the design in place, the fun really starts as we begin selecting the glass to complement the customer's tastes and execute the final piece.
The glass selection for the mermaid's scales was manufactured by Kokomo and is a blue/green vertigo. For me this was the perfect glass because of the unique texture and the color. The sea vegetation was created using seven different types of Uroboros, Youghiogheny and Oceana glass. All of the glasses are hand-rolled so each piece is unique. We used a fusible Spectrum glass for the skin tone. Finding the right glass for the skin is always a challenge (it's either too pink or too peach) but I was pleased with this glass. The water incorporated seven different types of blue glass from several different manufacturers. There were three different shades of Waterglass which is manufactured by Spectrum. One of my favorite types of glass used for the water was an Optimum noogie/foxtail glass which is no longer manufactured. I also used several blue tones manufactured by Wissmach. The most challenging part of glass selection was the hair. We used three different types of glass in her hair to create texture and movement. Uroboros, Youghiogheny and a small bit of Spectrum were incorporated. Last but not least, we also incorporated jewels throughout the piece for a fun bubble effect. In all we used nineteen different types of glass.
Once the glass is selected, the process of cutting and grinding the glass begins. We laid out the pattern at this stage to ensure the various pieces fit together well while the entire piece does not exceed the intended dimensions. Here's how the mermaid looked after cutting and grinding. Notice the pieces are still numbered as they were in the pattern above.
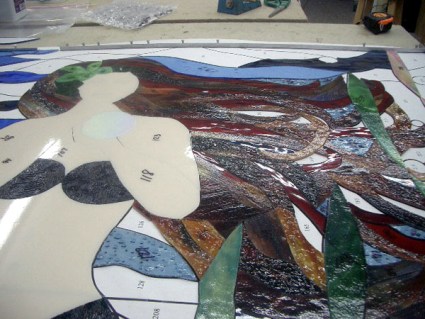
With the glass cutting and grinding done, it is time to foil each individual piece and then lay out the design on our work table. Here's a section of the tail where you can see some of the glass is foiled and some still is not.
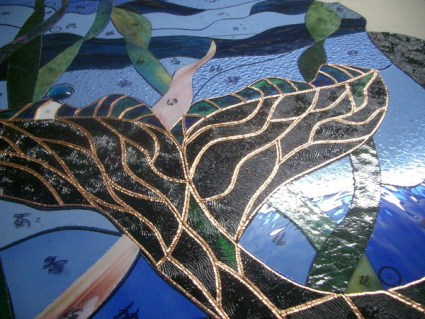
Once all the foil is in place it is time for the soldering. Here you can see the mermaid's various pieces are all foiled and ready to go to the next step.
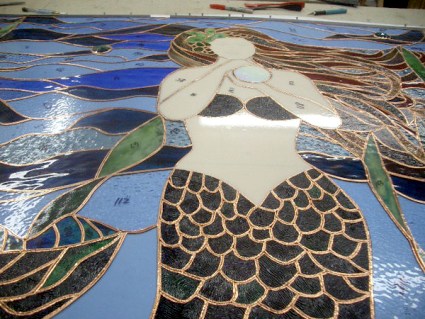
Now we are nearing the end, and the excitement in the studio reaches a higher level. Of course, so does our anxiety as turning a piece of this size so we could solder both sides presents some challenges. We soldered approximately 40 feet of reinforcement between the pieces of the glass which helped add strength both for the short term and long term. For the first turn we soldered one side and then sandwiched the piece between two stiff boards to turn her. The first turn is always the scariest — we certainly don't want cracks at this stage! It took three people to turn this piece each time, and four turns were required to complete the soldering and finishing processes. Along the way we added a nice patina and then polished that beauty up until she shined like a pearl.
For transportation of this piece we built a custom rack and it was again sandwiched between two stiff boards to avoid bending. Once the piece arrived at the installation site, our team choreographed an installation plan to get it from the car, through the house, into the bathroom, over the tub and into the window. It wears me out just thinking about it! Our plan worked and she was installed without any issues. Thanks to our great team, we were up to the task.
In the end, it is one of the most dazzling pieces we've created. Check out the final stained glass mermaid as installed in the Merrow's home.
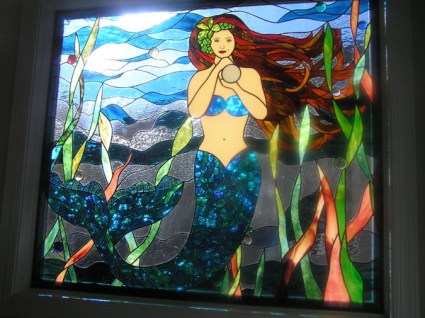
Here's a close-up. She's a masterpiece, don't you think?
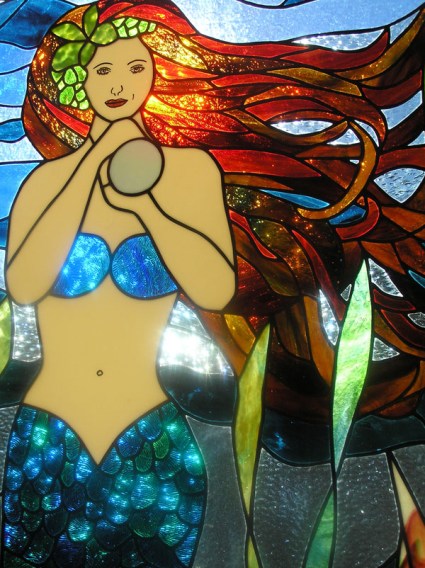
Thanks for reading along with us. This was truly a wonderful project and working with the Merrows was a joy.
If you wish, send me an email message letting me know what you think about the final piece. Feel free to visit our gallery to view other installed stained glass pieces.
~ Jere Roberts
About the artist
Jere's personal journey with stained glass started in 2001 when she took a beginning stained glass class. Four months later she decided she really wanted to work with glass, so she went to her local stained glass studio and purchased all the tools she needed. She then went home and started creating. In 2003, Jere opened her first teaching studio in North Carolina and called it Not Afraid of Color. Later she moved her entire studio to her house. Jere loves to share her work and to help customers bring their vision to light.
This pattern may be used to make one or more artworks for sale or personal enjoyment. This pattern may be printed for personal use only and may not be sold or given away in printed or electronic form.
Each month we feature a project designed using Glass Eye 2000. Do you have a project to share with the world? Contact Dragonfly Software and your creation might be our next Design of the Month.