In this lesson you'll learn how the crosshairs and grid lines can be used for the alignment of knots and lines. You'll also learn how to change the colors used for crosshairs and for selections, and options for changing the appearance of lines.
Remember the mushroom figure you created in Lesson 5? We will use that design in this lesson, so open that file (in the Tutorial folder) now. After the file is opened, enable Show Knots.
If your mushroom came out lopsided, you might be wondering how to get one that is perfectly symmetrical. This lesson will focus on tools for making your designs more precise.
![]() The crosshairs are a pair of perpendicular lines that you can position in the view. There are two styles of crosshairs. The most
commonly used consists of a horizontal and a vertical line. You can show them using the first of these toolbar buttons. The other style consists
of two diagonal lines, shown using the other button. Both styles of crosshairs operate in the same way: if a knot is created or moved near a
crosshair, the knot will be positioned directly under that crosshair. And if a crosshair is moved near a knot, the crosshair will be
positioned directly over that knot.
The crosshairs are a pair of perpendicular lines that you can position in the view. There are two styles of crosshairs. The most
commonly used consists of a horizontal and a vertical line. You can show them using the first of these toolbar buttons. The other style consists
of two diagonal lines, shown using the other button. Both styles of crosshairs operate in the same way: if a knot is created or moved near a
crosshair, the knot will be positioned directly under that crosshair. And if a crosshair is moved near a knot, the crosshair will be
positioned directly over that knot.
Let's use the crosshairs to line up the knots in the mushroom design. The mushroom you created should look something like the one shown on the next page. (If it doesn't, drag some knots until it approximates this shape.) Click the toolbar button that shows the horizontal/vertical crosshairs. Crosshairs appear in the view, most likely as two perpendicular red double lines, although the style of the lines can be changed in View Properties.
You may or may not see the crosshairs depending on whether the crosshairs are within the bounds of your view. If you don't see both crosshairs, try pressing Zoom Out (the "–" key) two or three times. If you still don't see them, choose "Set Crosshairs Origin" from the View menu and then click somewhere in the view. The crosshairs origin is the point where the crosshairs intersect.
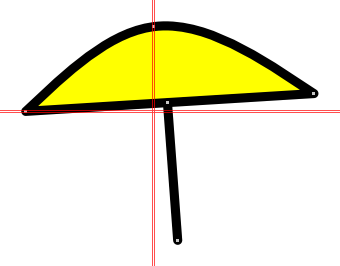 Now that your crosshairs are visible, let's position them. You move crosshairs just like you move knots: by dragging them around the screen. Drag the horizontal
crosshair over the leftmost knot and release the mouse button. Be sure the pointer itself, not just the crosshair, is over that knot when you release.
In a similar fashion, position the vertical crosshair over the topmost knot. When you have finished, your view should look something like this.
Now drag the rightmost knot down to the horizontal crosshair. Doing so makes the line representing the underside of the mushroom perfectly horizontal. Do not work too hard at positioning the knot exactly under the crosshair; just release it near the crosshair and the computer will position it exactly for you.
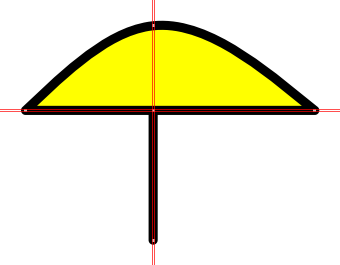 Drag the slider (the white knot) to the intersection of the crosshairs. And drag the bottommost
knot to the vertical crosshair. The "stem" of the mushroom now lines up perfectly below the topmost knot. Your design should now look something like this.
Now the knots line up perfectly. If you doubt the accuracy, zoom in on one of the knots. Even if you zoom far in, you will discover that each knot sits exactly under a crosshair.
Now try moving one of the crosshairs. Notice that this does not affect the design: the knots are not "stuck" to the crosshairs. The relationship between knots and crosshairs is a temporary one by design.
Turn off crosshairs by clicking the Show Crosshairs toolbar button again.
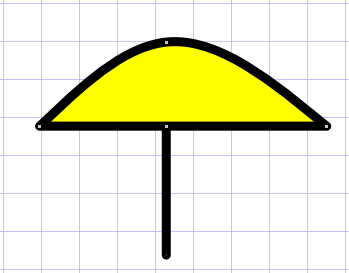 Although the knots of the mushroom design line up well, your design might not be symmetrical. This is because we have done nothing to ensure that the
leftmost and rightmost knots are the same distance from the stem line of the mushroom. In our last diagram, you might have noticed that the mushroom
extended to the right more than it did to the left.
![]() We can achieve the desired balance using grid lines. To see the grid, click the Show Grid toolbar button now. When grid lines are on, you see your design
against a background of regularly spaced lines.
We can achieve the desired balance using grid lines. To see the grid, click the Show Grid toolbar button now. When grid lines are on, you see your design
against a background of regularly spaced lines.
![]()
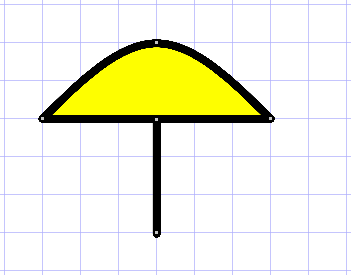 You now see the grid lines, but to make them even more useful we can turn on automatic grid snapping.
This will cause every knot, when created or moved, to be positioned over the nearest grid line intersection point, known as a "grid point."
Turn on Auto Grid Snap now by clicking its toolbar button. Now drag each knot, one at a time, close to a grid point. It should be easy to make the mushroom symmetrical.
You can, of course, specify the spacing of the grid lines, but this takes more than the click of a button. To set the spacing you need to use the View Properties dialog box. To bring up the dialog box, press Ctrl+E or choose "View Properties" from the View menu:
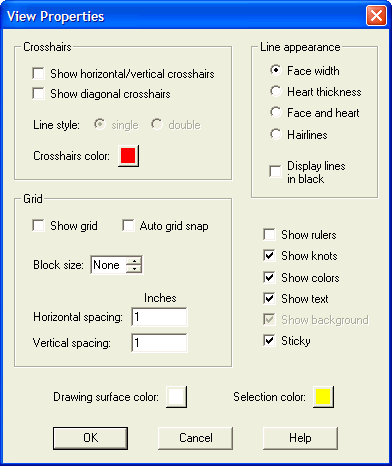
As you see, there is a lot you can do in this dialog box. Some of the options (Show rulers, Show knots, Show colors, etc.) we have seen before as buttons on the toolbar.
Let's focus now on the fields available for horizontal and vertical spacing of grid lines. Here is where you enter whatever you want the spacing to be, even making the horizontal spacing different from the vertical spacing if you wish. Grid lines start at the zero position on the rulers, and are offset from there at the specified spacing values. If you want a thicker grid line to appear at regular intervals, use the "Block size" option. For now, just enter 2 for the horizontal spacing and 3 for the vertical spacing, then click OK to see the effect of those changes.
While we're here, let's complete our understanding of view properties. Bring up the View Properties dialog box again. As we have seen, some view properties can be set using toolbar buttons. Here are those properties that can be set only from this dialog box.
Click "Cancel" to dismiss this dialog box.
Turn off grid lines and close this design. When asked if you want to save changes, click "Yes."