In this lesson you'll learn how to add knots to a line using the Add Knot and Subdivide commands. You'll learn to remove knots by selecting and deleting them.
A general rule for drawing lines is:
Begin this lesson by clicking the New button to start a new design.
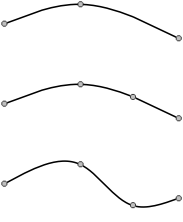 Adding and deleting knots from a line couldn't be easier. Let's experiment on a new line. Draw a curve that looks something like this.
![]() Now click on the Add Knot toolbar button. The pointer changes to a
Now click on the Add Knot toolbar button. The pointer changes to a ![]() shape to indicate that you are in Add Knot mode. Place the tip of the arrow somewhere in the middle of the right line section and click.
The curve should now look like this.
shape to indicate that you are in Add Knot mode. Place the tip of the arrow somewhere in the middle of the right line section and click.
The curve should now look like this.
Now enter Pick mode and drag the new knot to another location. Dragging it downwards, you might get this.
Let's delete the knot you just added. Click on the knot to select it, then press the Del key. (Clicking the Cut toolbar button, or choosing "Cut" or "Delete" from the Edit menu, will do the same thing as pressing the Del key.) The line is now restored to the shape it had before you added the knot.
 We will now make the design that appears to the right. Before we get started, use the "Drawing Properties" command (discussed in the previous lesson) and make
sure that the "Make each shape a group" option is turned off.
We will now make the design that appears to the right. Before we get started, use the "Drawing Properties" command (discussed in the previous lesson) and make
sure that the "Make each shape a group" option is turned off.
Draw the border first. Choose "Square" from the Draw menu and draw a square on your screen not too close to the curve you just created. Recall that the square will be created as four connected curves.
Instead of immediately drawing the three other lines, which would be hard to do precisely, let's first position the other knots. We want the knots to be evenly spaced along each side. Notice that the top and bottom lines are divided into two equal sections and the side lines are divided into three equal sections.
Enter Pick mode and select both the top and bottom lines; remember to hold down the Ctrl key as you click on the second line. Choose
"Subdivide" from the shortcut menu to bring up the dialog box you see to the left.
You want to divide each of these lines into two sections, so accept the number 2 in the dialog box by clicking OK. The square should now look like the first figure below.

Select the left and right side lines and do the same, except divide them into three sections each by entering 3 in the Subdivide dialog box. It is now easy to draw the remaining lines precisely. Click the Curve toolbar button and draw them as shown above.
One problem with the figure you just created is that you can't color it. The reason is that the new lines you added do not intersect one another; they overlap. Imagine building a window by overlapping lead came instead of soldering sections together!
What we need are two "weld" points in the center of the design. This is easily done using the Add Knot command we introduced at the beginning of this lesson. Get into Add Knot mode again and click (with the tip of the arrow) on each intersection point.
You should now have knots at both intersection points as shown in the middle diagram above. Now color the pieces with whatever colors are currently available on your color palette.
We do not want to keep any of this work, so choose "Close" from the File menu and click "No" when asked if you want to save.
Next Lesson: The "Suggest" Command