The remaining lessons will look at the features of Glass Eye 2000 in greater detail. In this lesson, we'll examine some of the details we glossed over in Lesson 1. We'll look closely at:
We'll also introduce you to our Help system.
When the program starts for the first time, your screen looks something like this:
If you have completed Lesson 1 you are likely to see the "Barnaby" design on your screen. This is because the program automatically loads whatever design was last worked on by a previous user.
This is a standard Windows application. At the top is a title bar showing the name of the program ("Glass Eye 2000"). Below that is the menu bar, which gives access to nearly all commands. Below the menu bar is the toolbar, which gives quick access to the most common commands. At the left is the color palette, which you will use to define the colors in your stained glass window. The large area in the center is the view, which is where designs appear. Just below and to the right of the view are scroll bars that allow you to move your view up, down, right and left. And at the very bottom is the status bar, which displays helpful textual information, including the horizontal and vertical position of the mouse pointer.
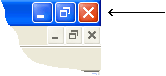
In the top right corner of Glass Eye 2000 you will see a triplet of buttons. (There is a second triplet below it, but consider only the top triplet for now.)
The triplet will appear in one of two ways:
Here is the meaning of each of these buttons:
You will probably have best results if Glass Eye 2000 fills your entire desktop. If you see the maximize button in the middle of the triplet, then click on it to make the main window as large as possible. If you do not see the button, your window is already maximized.
The buttons on the toolbar are of two types. The first type of buttons show you the mode that you are in. The mode represents your current activity. There is a mode for changing colors, another for zooming in or out, etc.
![]() For example, here you see the Pick toolbar button. This button currently appears pressed in, telling you that you are in Pick mode. In this mode you can
select the lines of a pattern and change their shape.
For example, here you see the Pick toolbar button. This button currently appears pressed in, telling you that you are in Pick mode. In this mode you can
select the lines of a pattern and change their shape.
The other type of toolbar buttons are property buttons. These buttons show you what properties are set for the current view of your design. You will be introduced to view properties in Lesson 3.
You can find out what each button does by resting the pointer over it for about a second (without moving the pointer or clicking the mouse). The name of the button will appear in a little box called a tool tip. When the tool tip appears, you can also read a longer description of the button down in the status bar. Try it now by resting the pointer over the Pick button. If you forget which toolbar button accomplishes a desired function, just move the pointer across the toolbar, pausing at each button, until you see the name of the button you want.
 Units and precision
Choose "Units and Precision" from the View menu. The dialog box that you see at the right will appear. Set the first "Units" control to Inches, but use Feet for the other units. Set all "Display format" controls to Decimals. "Decimal precision" determines how measurements are rounded when displayed. Choose 0.01 in every case indicating that measurement values are rounded to the nearest 1/100". Check the "Show units" box so that a symbol for your choice of units appears on the rulers and the status bar. Make sure the precision values at the bottom are both set to 1°.
Click the OK button when the options are properly set.
In Lesson 1 you used the "Page Setup" command on the File menu to specify printing options. Let's take a closer look:
Here you have a variety of options for how your design looks when printed:
Format
| All on one page: | Print the design as large as possible on a single sheet. |
| Actual size: | Print the design at its actual size, even if this means spanning several sheets of paper. |
| Scale by: | Print at actual size, but changed by the given scale factor. |
| When printing actual size or to scale, you have the options of printing a border around the usable area of each sheet and, putting page numbers on sheets, and showing the scale factor on sheets. | |
Show title and artist / Show date and time / Show filename
Enable these options if you want the corresponding information to appear on the printed pages.
Reverse design
This prints a mirror image of your design. Use this option if you want to print a view of your design from the rear instead of the front.
Paper
| Size: | Letter, Legal, Envelope, etc. |
| Source: | Manual Paper feed, Sheet Feeder, Tractor feed, etc. |
| Your choices here depend on the type of printer you have. Don't change these settings unless you are sure that you must. | |
Orientation
Portrait or Landscape, depending upon whether you want the short or long edge of the paper at the top of the page. Checking the Auto option will choose whichever orientation uses the fewest pages. The page count is shown in the top left corner.
Margins
The size of the margins determines the border area of each page.
Printer…
Select a different printer if you need to, and optionally change printer properties.
Calibrate…
This invokes Printer Calibration, which allows you to compensate for printer inaccuracies caused by the printer hardware itself or by problems with your printer driver.
![]() Before printing a design, you can see what the design will look like on paper using Print Preview. Confirming that your design will print the way you want it to
can avoid the waste of a faulty printout. Click the Print Preview toolbar button now, or choose "Print Preview" from the File menu. You should see one
or two pages showing you how the design will print. Click the "Next Page" button a few times to view the pages. Click "Close" to exit Print Preview.
Before printing a design, you can see what the design will look like on paper using Print Preview. Confirming that your design will print the way you want it to
can avoid the waste of a faulty printout. Click the Print Preview toolbar button now, or choose "Print Preview" from the File menu. You should see one
or two pages showing you how the design will print. Click the "Next Page" button a few times to view the pages. Click "Close" to exit Print Preview.
If you are using a low-resolution display you might not see this button. If possible, increase your screen resolution by clicking the Start button on the taskbar, choosing Settings, choosing Control Panel, double-clicking Display, choosing the Settings tab, and increasing the screen or desktop area.
![]() Choosing "Print" from the File menu, or clicking the Print toolbar button, brings up the Print dialog box.
Choosing "Print" from the File menu, or clicking the Print toolbar button, brings up the Print dialog box.
Use this dialog box to choose the printer, a range of pages and the number of copies. (Number of copies and collation options will be unavailable if not supported by your printer driver.) If you were to click the "Properties" button you would bring up another dialog box that gives you extra control over your printed output, such as graphics resolution and color adjustment. The properties you see will depend on the type of printer you have installed.
We conclude this lesson with an introduction to the Help system. The easiest way to get Help is to press the F1 key. This brings up a Help window, which looks like this:
Click the Contents tab to find topics grouped by subject.
Click the Index tab to find specific topics listed alphabetically.
Click the Search tab to find all the topics containing a specific word or phrase.
Click the Favorites tab to bookmark an interesting topic.
Click the Glossary tab to read definitions for terms used in Glass Eye 2000.
Experiment with the Help system now. After you click the tab you want, follow the instructions on your screen. For example, you might want to try to find the list of answers to common user questions by clicking the Index tab and then double-clicking "common questions." When you are ready to continue, click outside of the Help Topics window to dismiss it.
![]() You can get help on a specific feature by using the "What's This?" command. Try it now by clicking the toolbar button shown at the left. This puts you in
"What's This?" mode, signified by the pointer appearing as an arrow and a question mark together. Now choose any menu item as if you were selecting it
for use. A help screen will appear describing the use of that menu item. After you read the description, dismiss the help window.
You can get help on a specific feature by using the "What's This?" command. Try it now by clicking the toolbar button shown at the left. This puts you in
"What's This?" mode, signified by the pointer appearing as an arrow and a question mark together. Now choose any menu item as if you were selecting it
for use. A help screen will appear describing the use of that menu item. After you read the description, dismiss the help window.
You can similarly get help on anything you see on the screen. Enter "What's This?" mode again, and this time click on a toolbar button. As before, the help window for that feature appears. You can try this on the color palette, the scroll bars, the status bar, the view, etc.
Lastly, "What's This?" will give you help on keyboard functions. Enter "What's This?" mode, and then press a key that has been defined for use within Glass Eye 2000. For example, try pressing the F5 key while in "What's This?" mode to find out what it does.