Sending a design to Cricut Design Space
Bringing a Glass Eye 2000 design into Cricut Design Space (CDS) is easy by following a few simple guidelines. This document will tell you all you need to know.
Step 1: Use Glass Eye 2000 to export your image
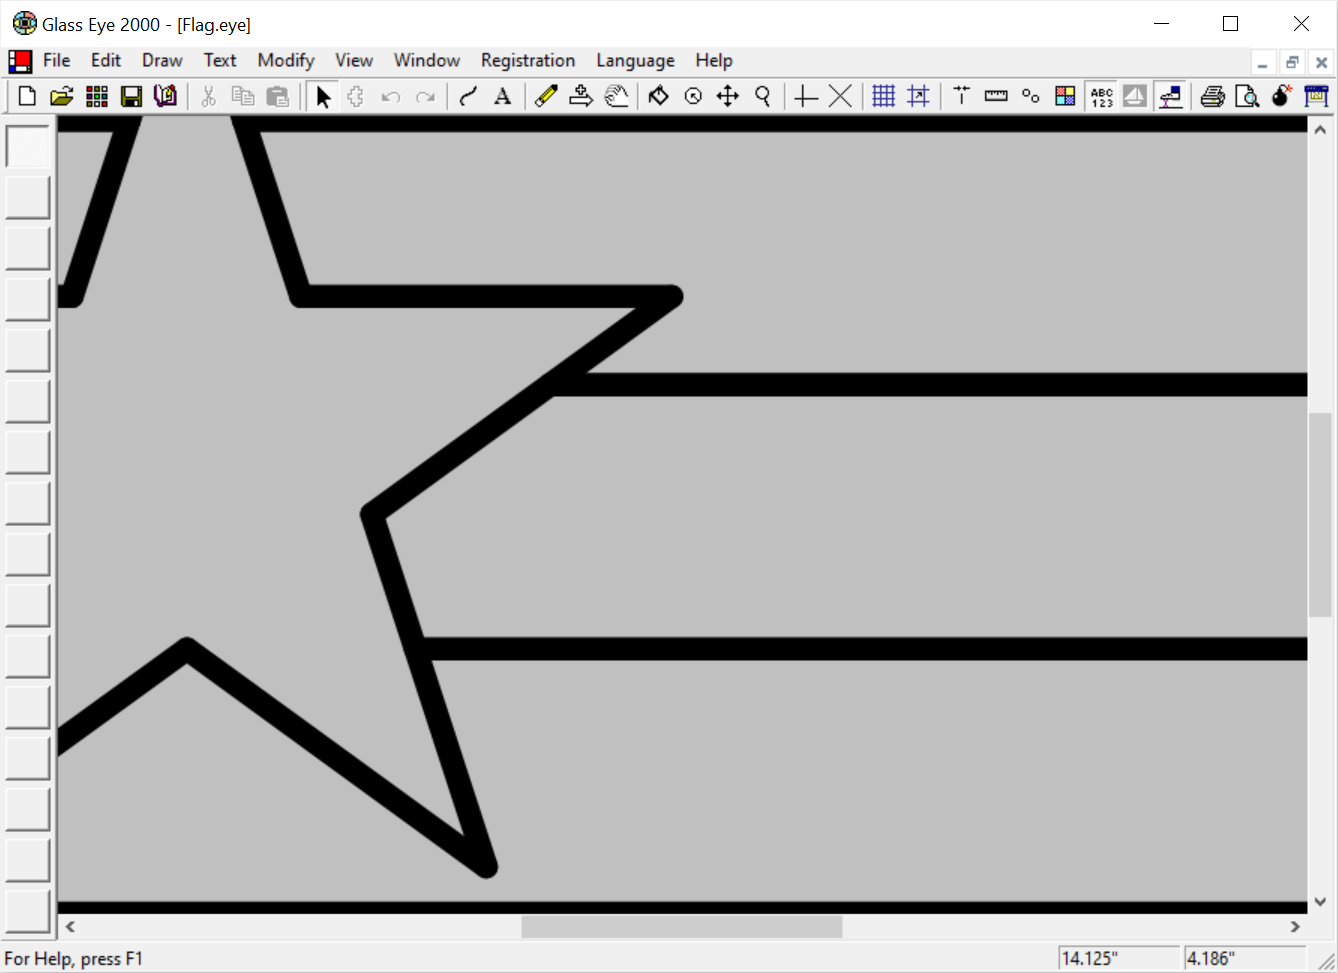
In this step you'll create a new file in JPEG or PNG format, and that's the file you'll import into CDS. We'll show how to do this using the Flag design in the Glass Eye 2000 Tutorials folder, so open that file now if you'd like to follow along.
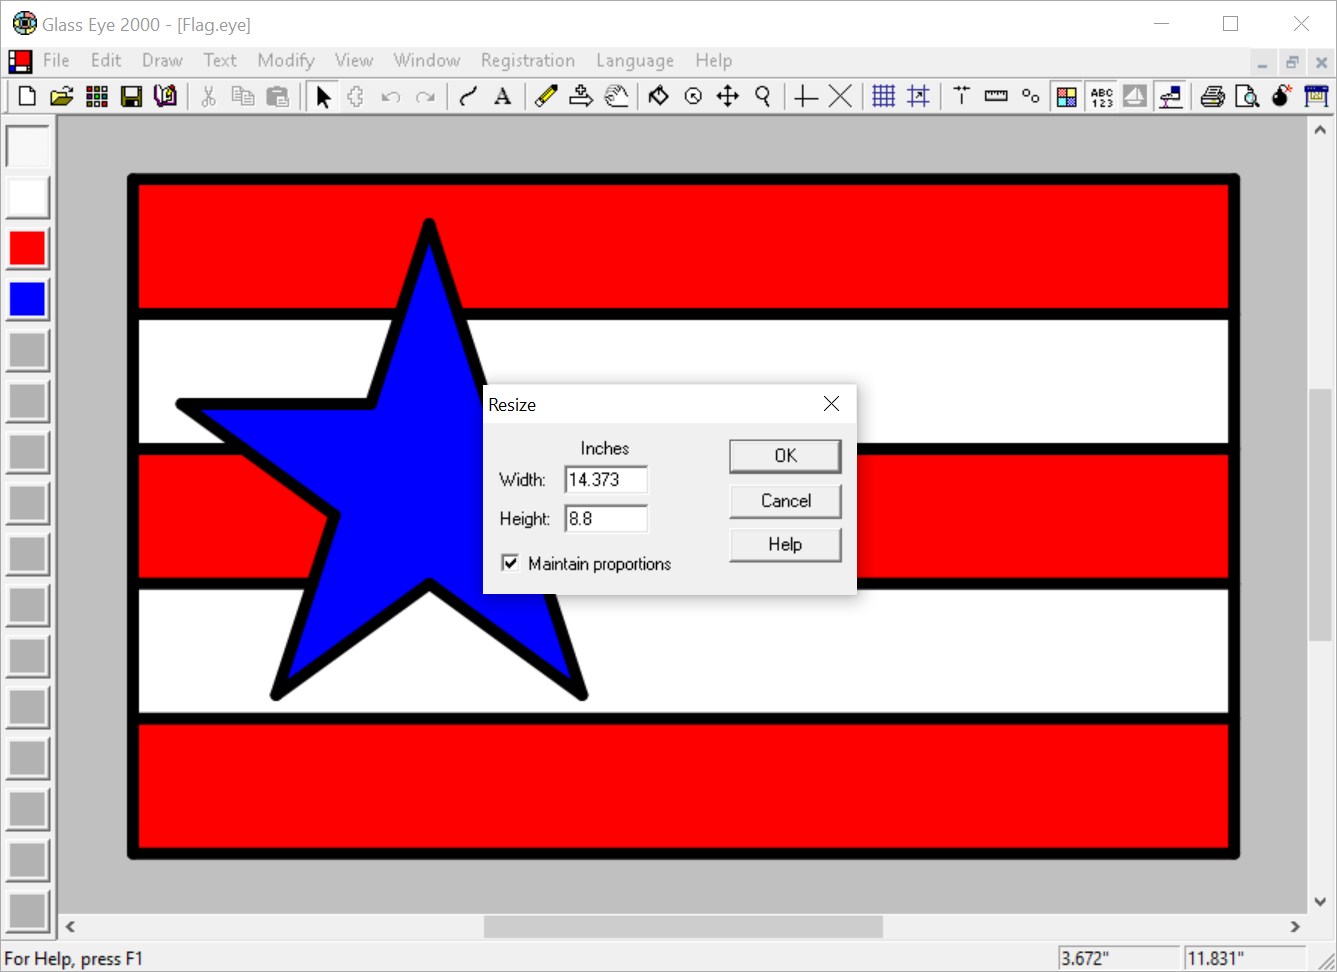
Your design might already be the size you need, and you can see that size by using the "Resize All" command on the Modify menu. If that size needs adjusting, do so using that dialog box. Remember that in Glass Eye 2000 measurements are done midline-to-midline, thus ignoring your line widths.
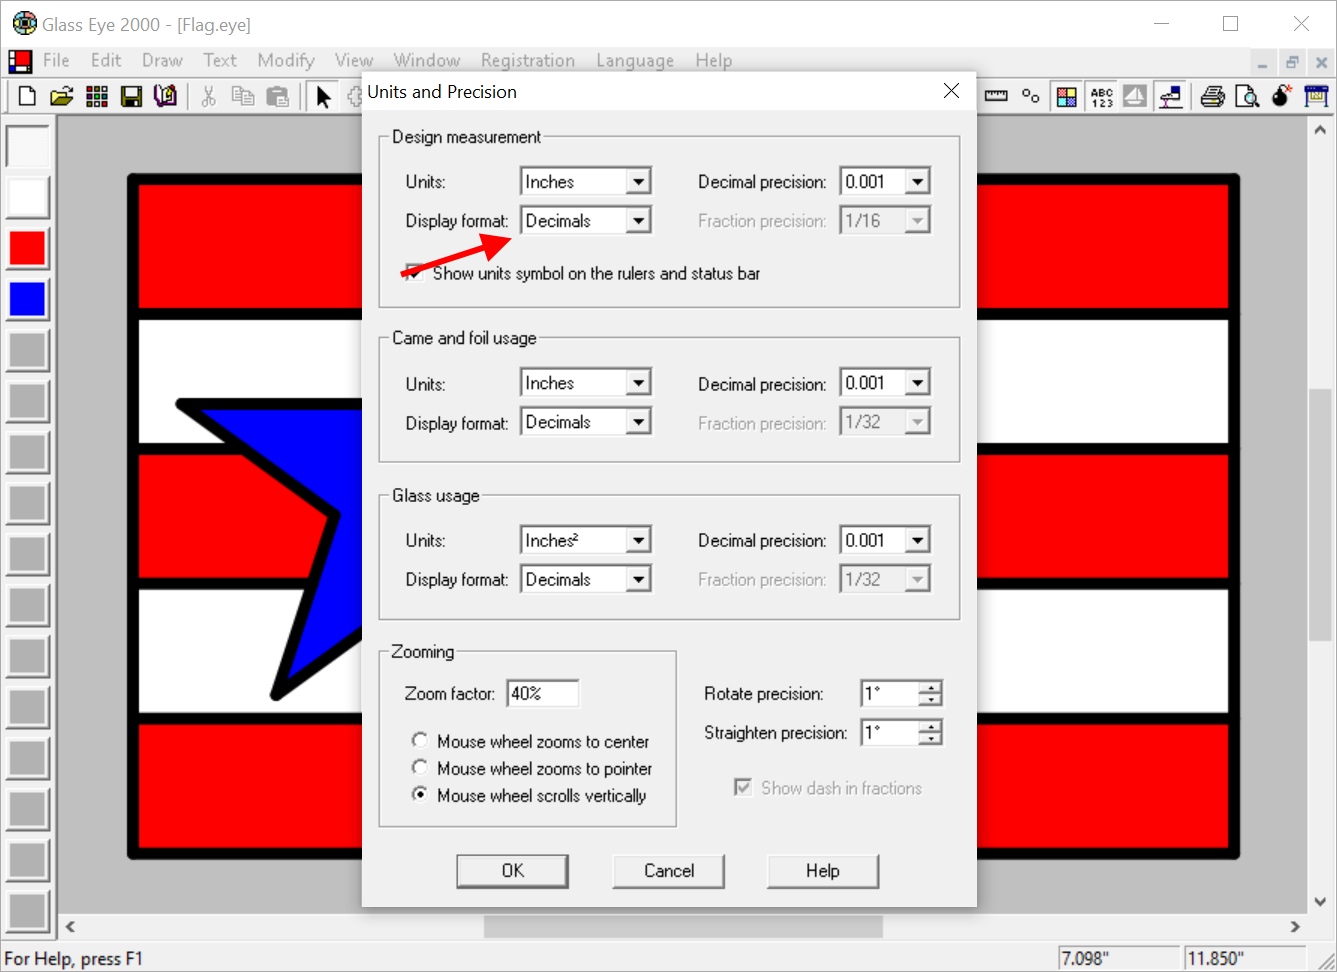
If you see sizes with fractions, you might consider changing your measurement display to decimals to match the measurement display in CDS; for example, to see 6.625 instead of 6 5/8. To make the change, use the "Units and Precision" command on the View menu and change design measurement to decimals. (We're using inches in CDS, so we'll choose inches here as well, but you can switch to metric in both apps if you wish.) You are not required to switch to decimals if you prefer to work in fractions.
You'll have the option to resize after you import into CDS, but by doing so you'd also be resizing your line widths, which you probably want to avoid. By resizing in Glass Eye 2000 before exporting, you'll achieve the right pattern size while preserving your desired line widths.
Next, you'll probably want to set your line appearance to show the heart thickness rather than the face width (and certainly not both) assuming that you've set the heart thickness properly for all lines. Use the "View Properties" command on the View menu to set the line appearance accordingly.
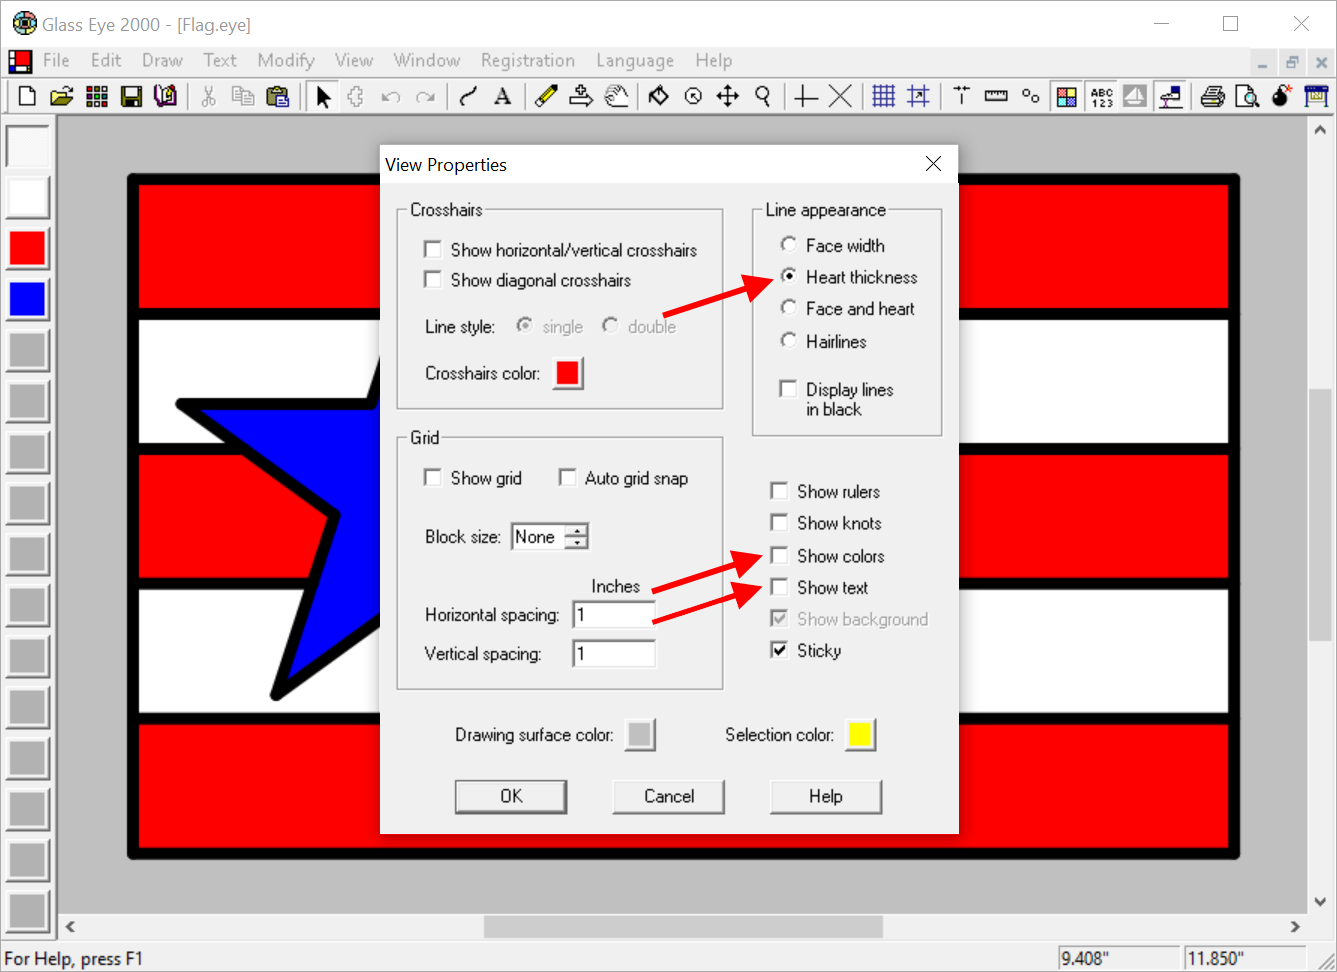
While you're there, if you have any lines that are not black you'll want to choose the option called "Display lines in black." In addition, use this dialog box disable colors and text (if you have any). It doesn't matter if you show knots or not, because knots are never exported. Your design should now appear as black lines only, and you're ready to export.
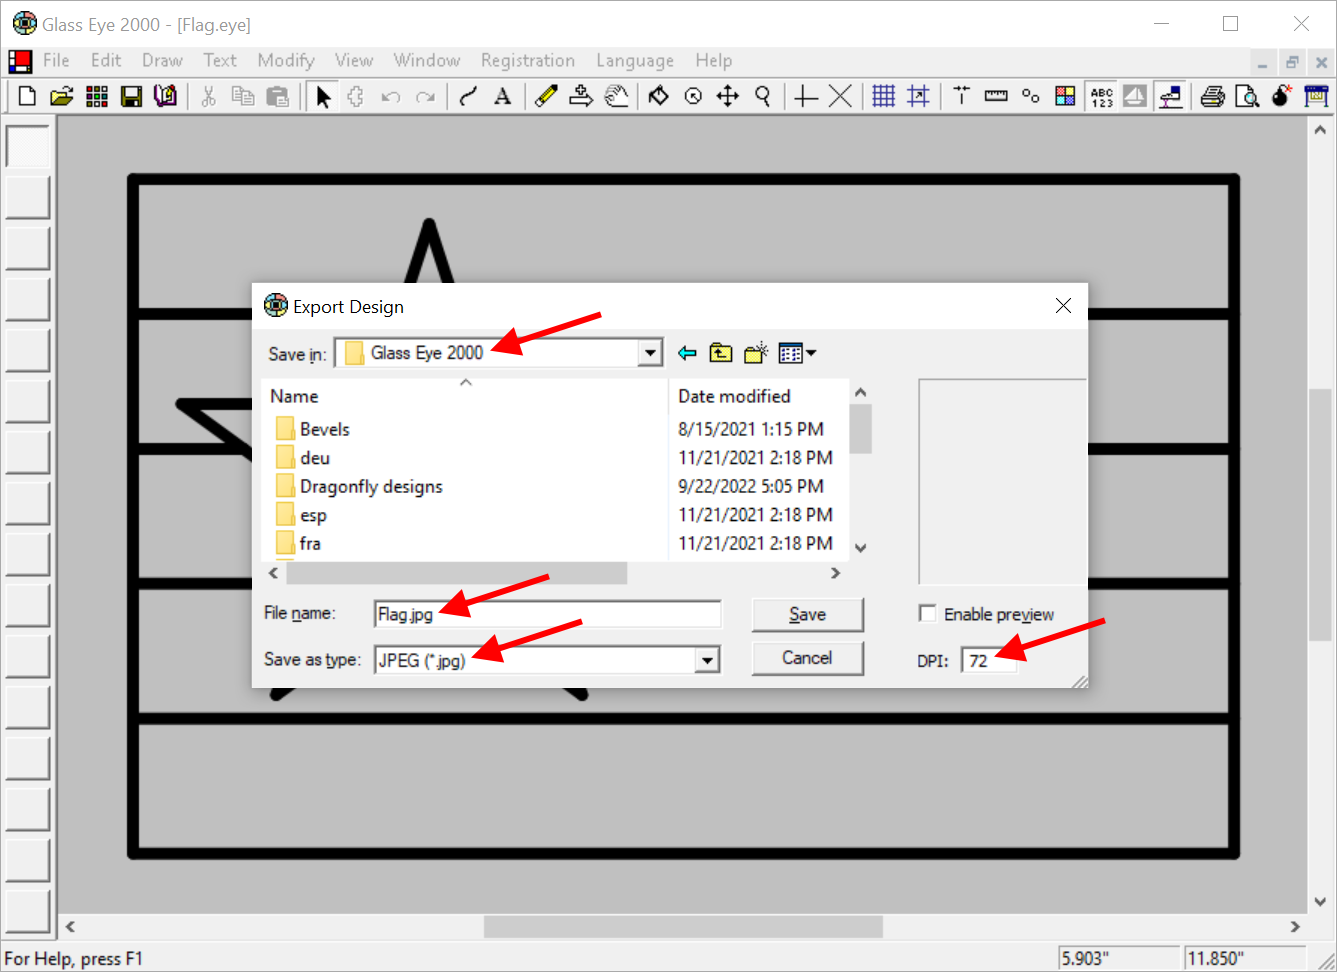
Use the "Export Design" command on the File menu. Choose any folder you wish for the exported file, but be sure to remember your choice as you'll need it later. As your file type, choose JPEG or PNG. The file name is probably fine as is, but you can rename it if you wish.
If you are running an edition other than the Standard Edition, you'll see a field for entering a DPI (dots per inch) value. Enter the value 72, then click the Save button to create the file. Here we show exporting the flag design to the Glass Eye 2000 folder as a JPEG with the filename Flag.jpg at 72 DPI.
The value 72 represents the "resolution" used in your exported file, and is a measure of image quality. An image is a two-dimensional matrix of dots (or "pixels") and the image you've just created will have 72 dots horizontally and vertically. Why 72? As of this writing, CDS assumes this value on images it imports when computing their size. Why this is so is a mystery to us, because CDS should be able to adapt to any file resolution. In any case, if you export at 72 DPI then you won't have to adjust the size later in CDS.
Users of the Standard Edition don't have the ability to set a specific DPI, and instead the DPI of their exported file defaults to the DPI used to draw the design on their computer display. Often this is a small value that results in a low-quality export, so for these users we recommend zooming in on their design (pressing the "+" key a few times will do this, or use one of the Zoom commands) which increases the DPI on the screen, resulting in a greater DPI in the exported file.
By zooming in as shown above we end up with a DPI of around 100, but the exact value doesn't matter. You could zoom in more if you wish for an exported image of even higher quality. An image of low quality won't look good in CDS, so at this stage having a DPI that's too high is better than one that's too low. In the discussion of importing below, we'll discuss how to deal with an unknown DPI.
You might now wish to close your design. If you've made changes since opening it, you'll be asked if you want to save those changes. Click "Yes" if you do, or "No" otherwise.
Step 2: Use CDS to import your image
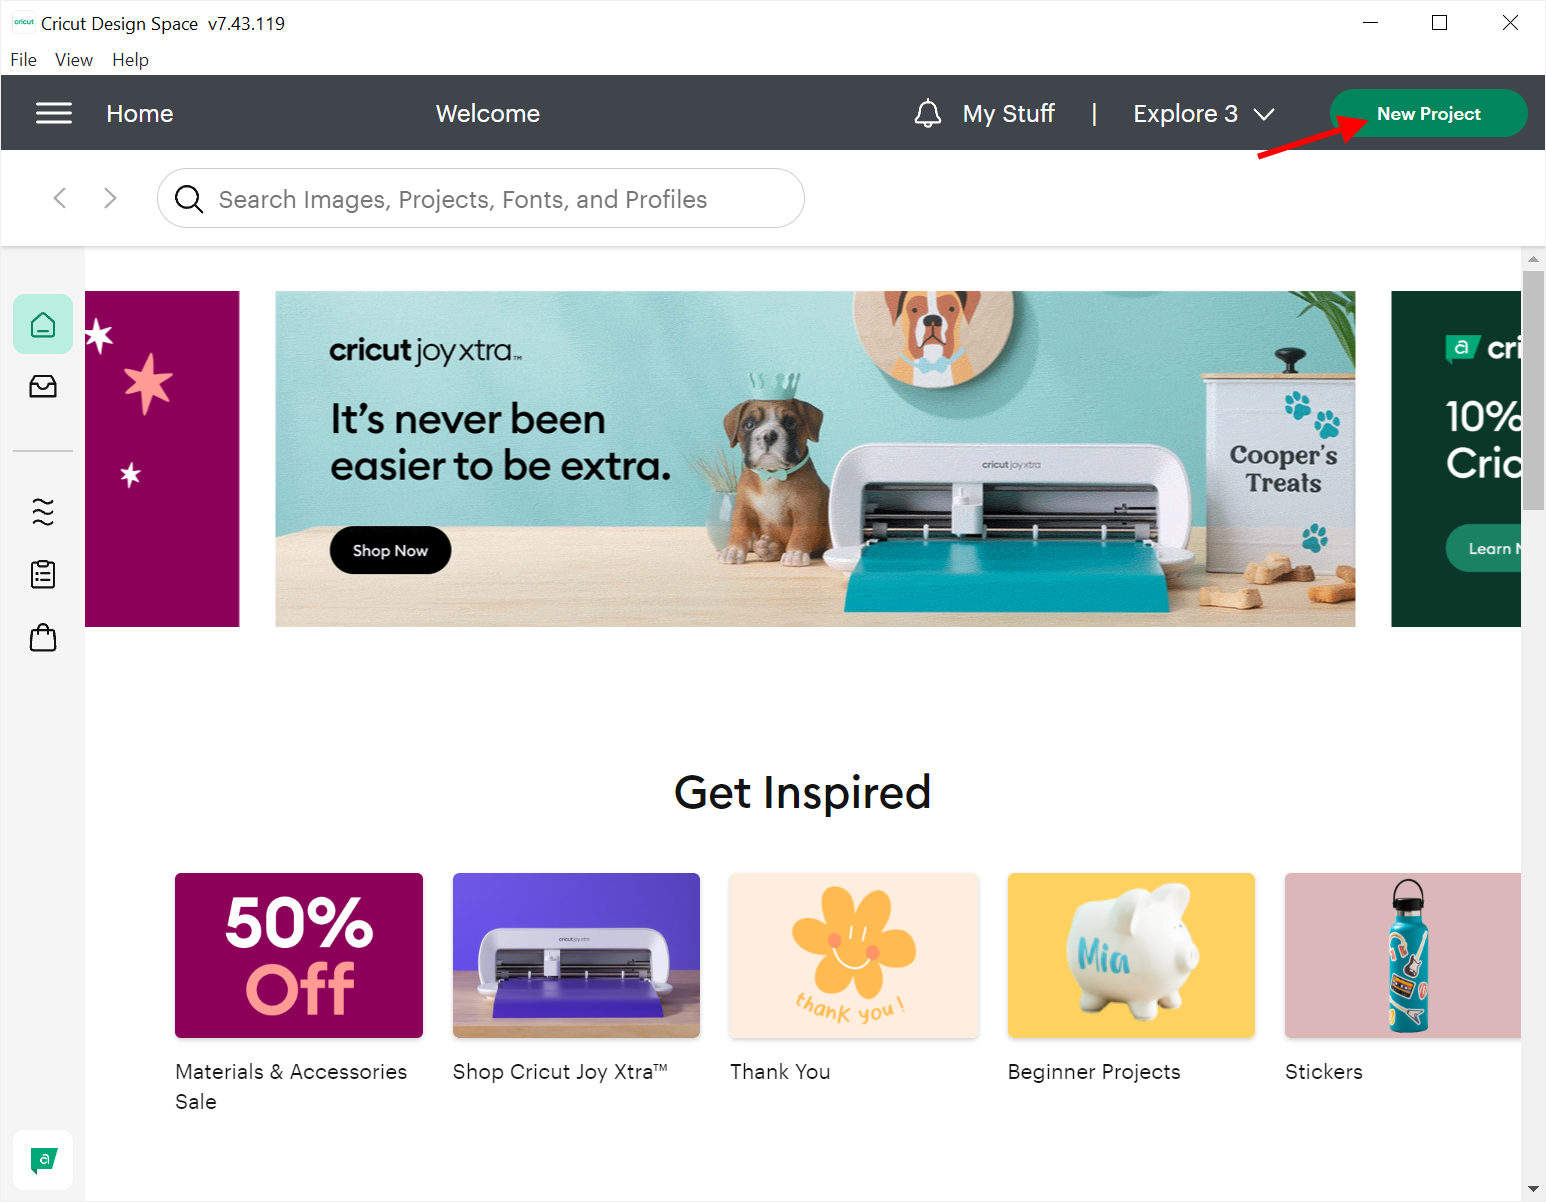
Start CDS and click the "New Project" button.
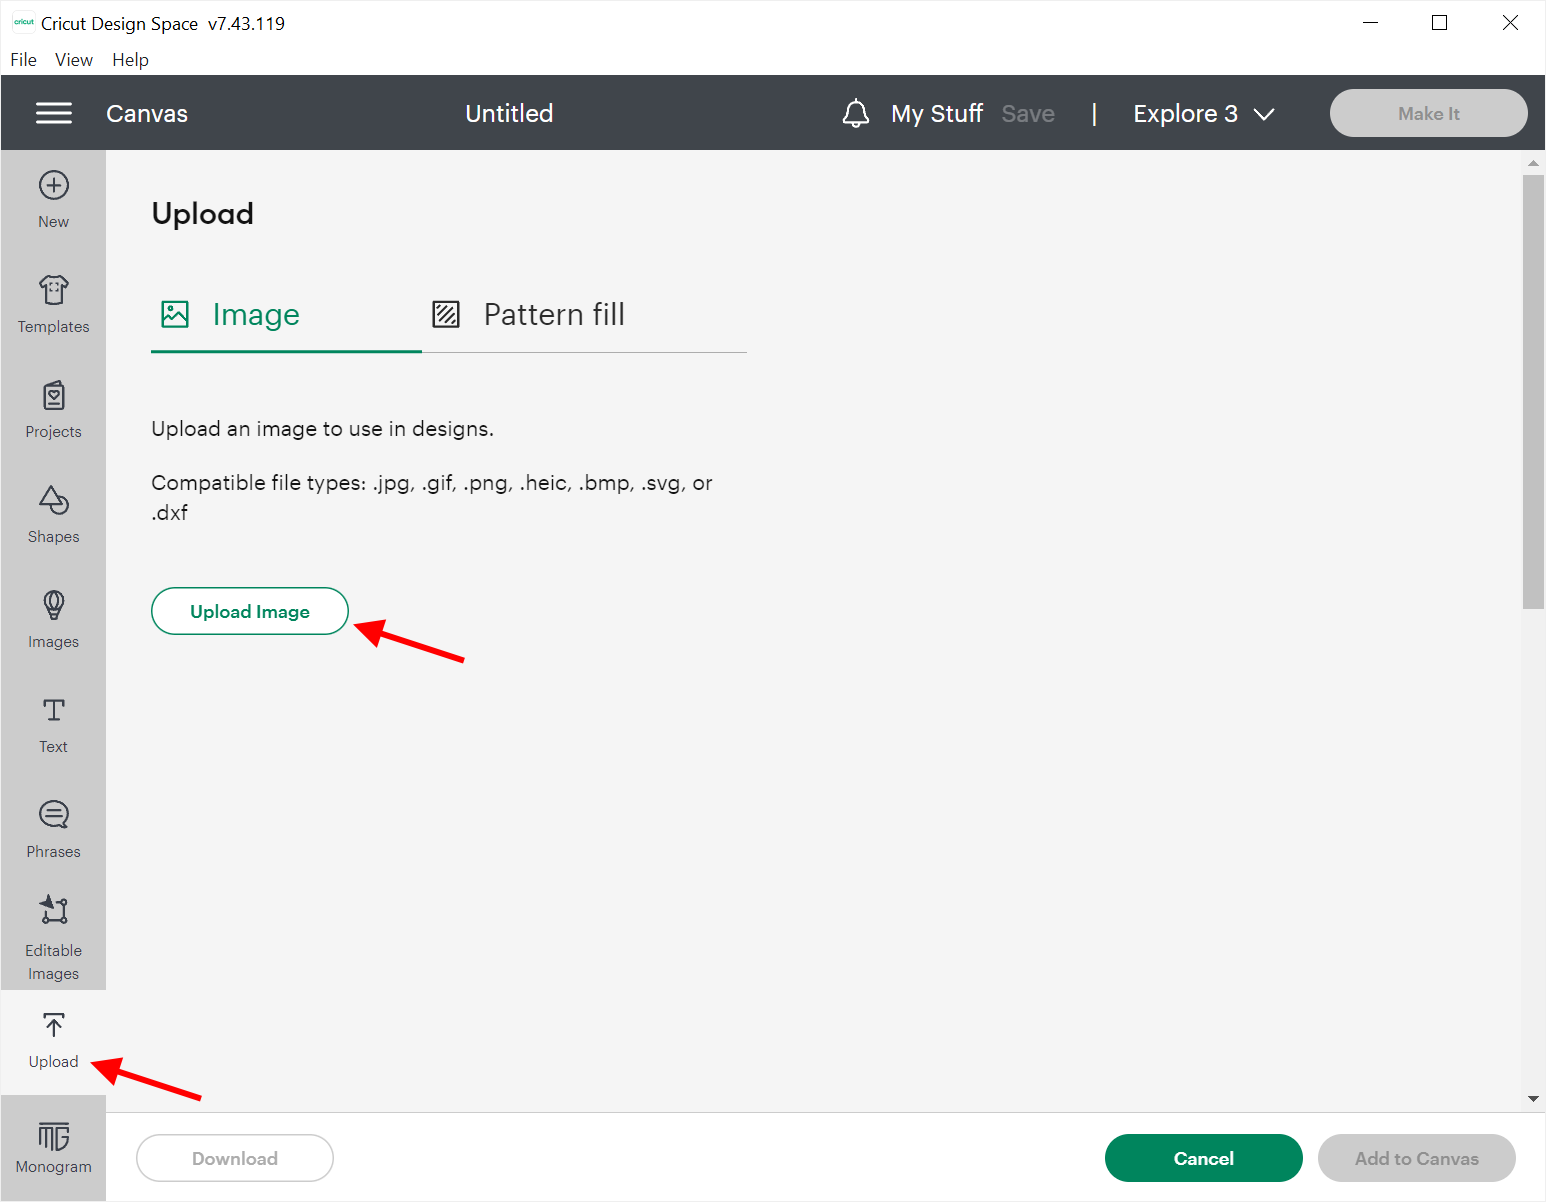
Click "Upload" on the toolbar on the left. On the next screen that appears, click the "Upload Image" button.
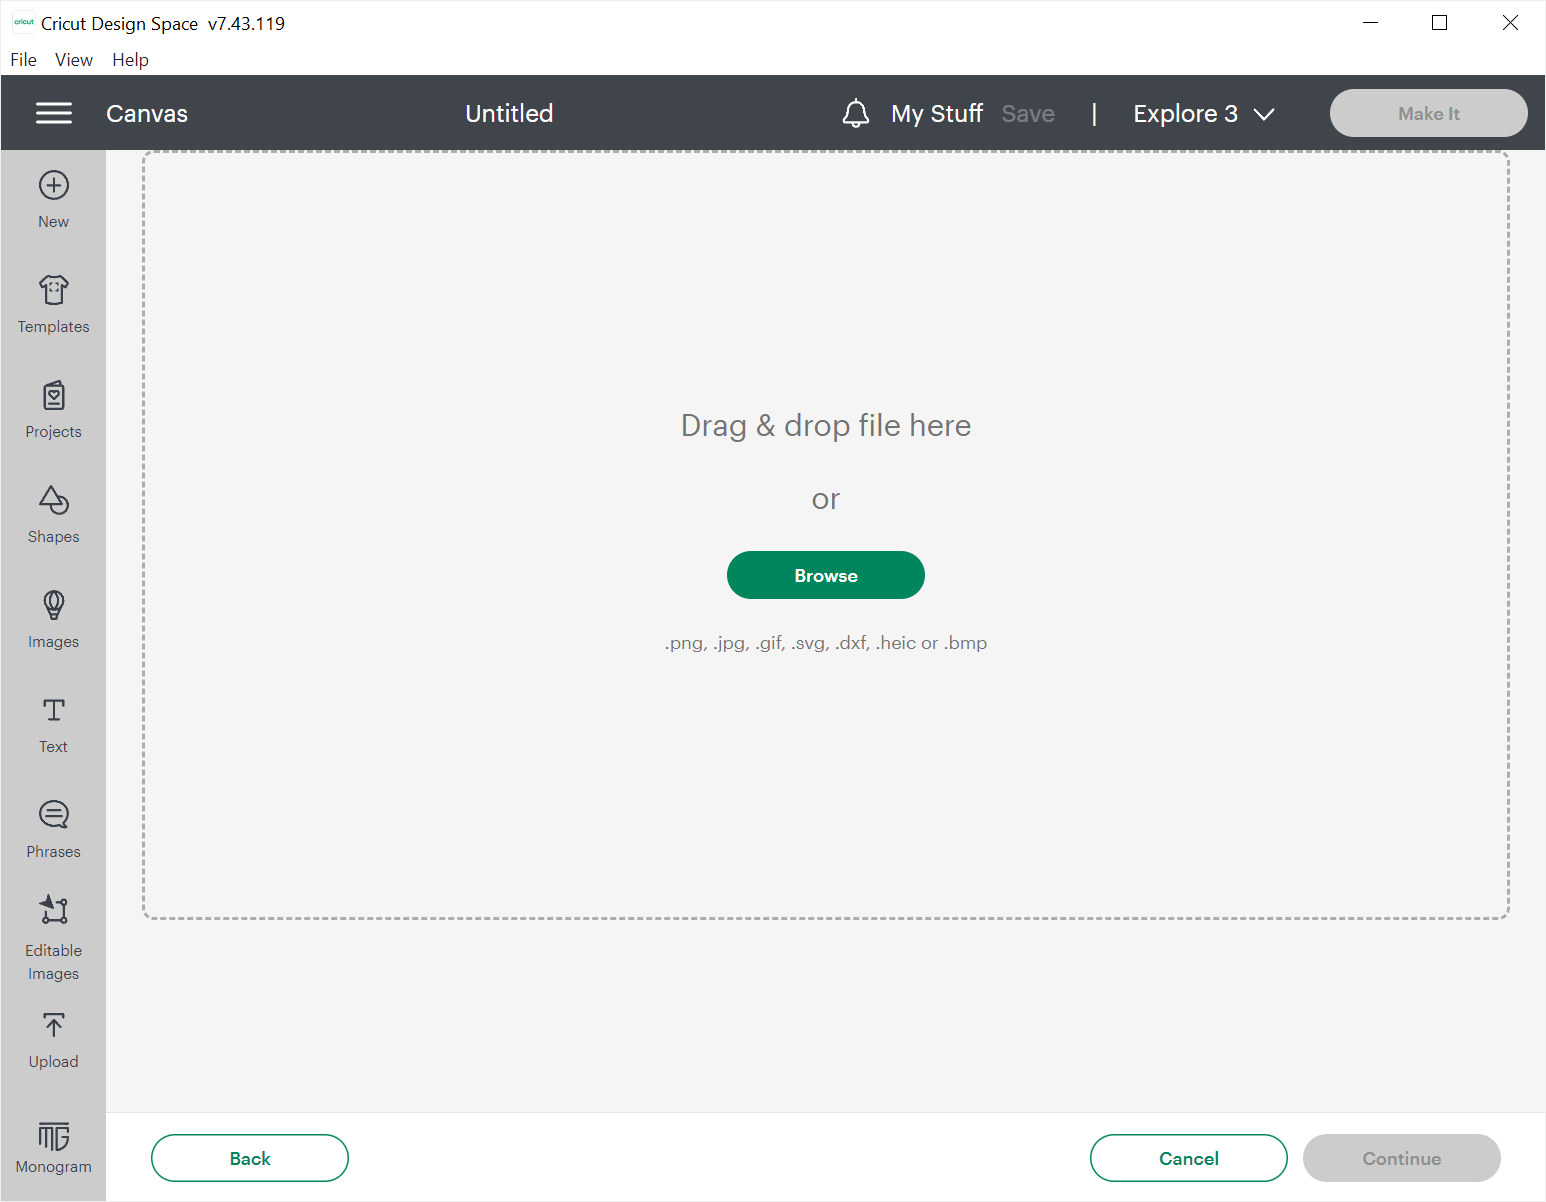
Next you can either drag-and-drop or browse. That is, you can either drag your exported file to the location on your screen, or you can click the "Browse" button, navigate to your file, and click the "Open" button.
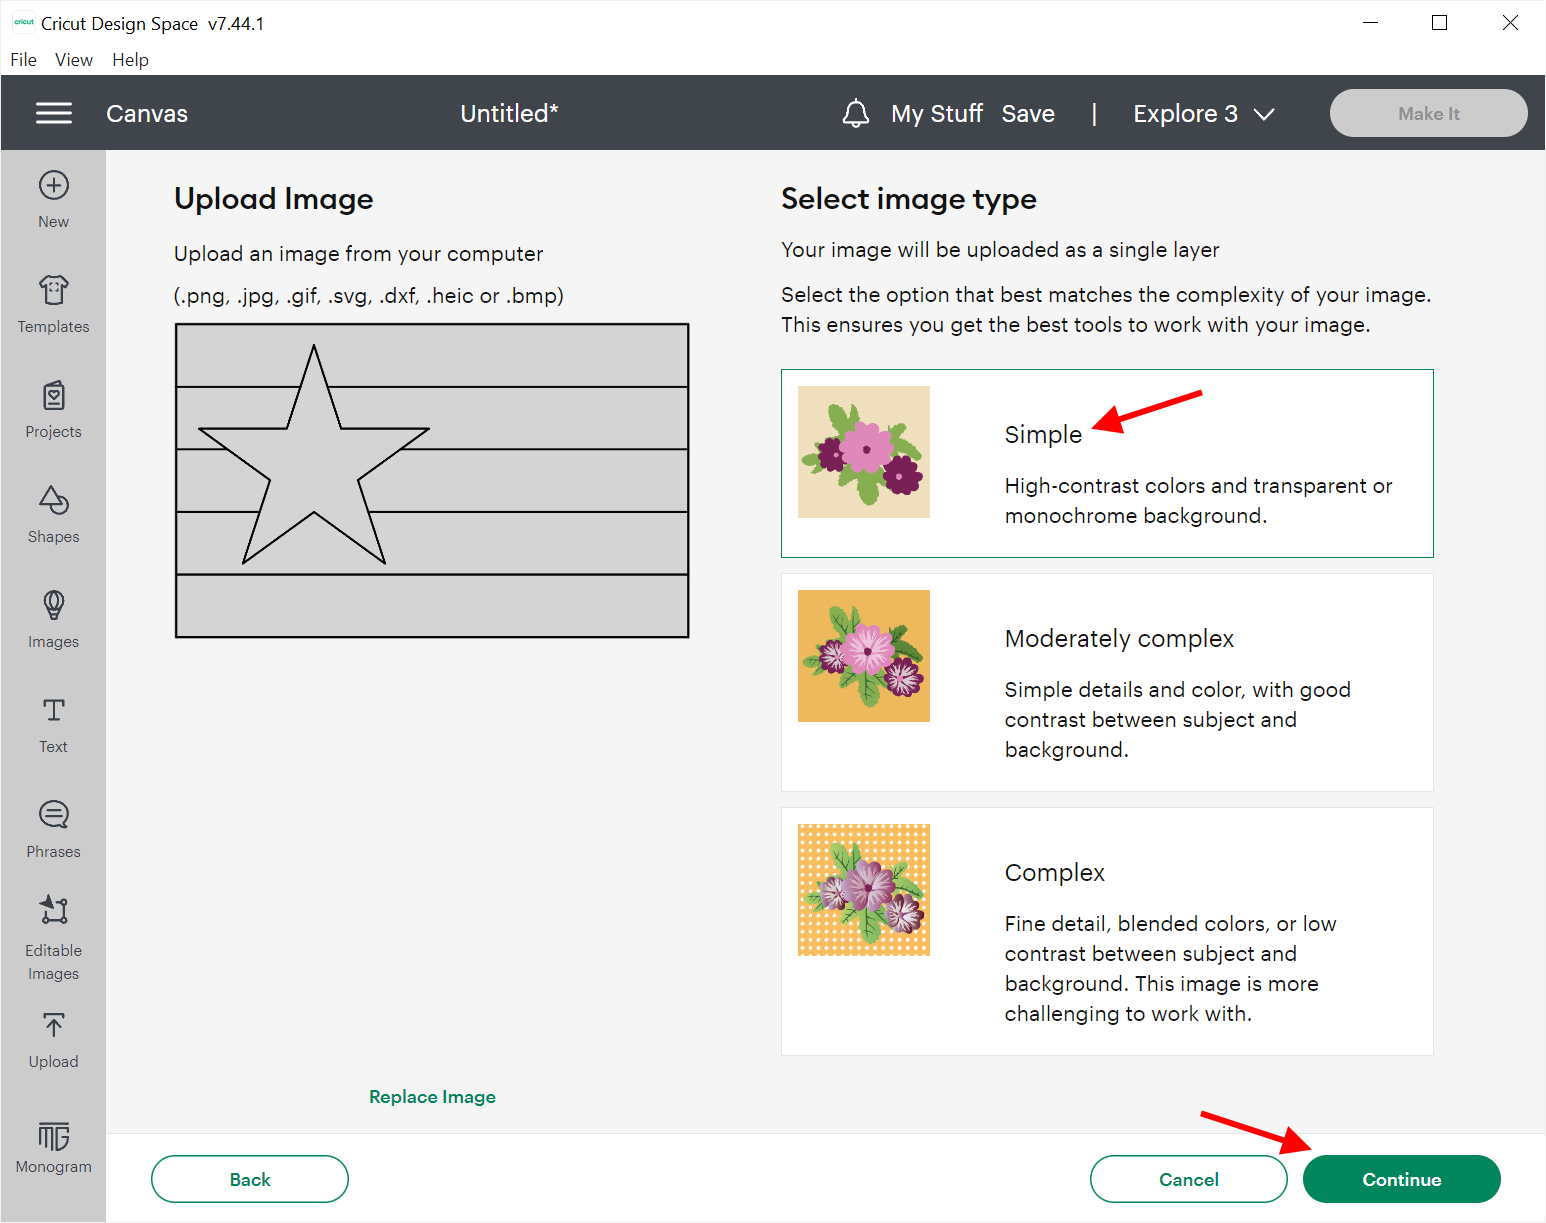
On the next screen you'll see an image of your design on the left and image types on the right. Because you have a simple line drawing with no color, choose "Simple" and then click the "Continue" button at the bottom.
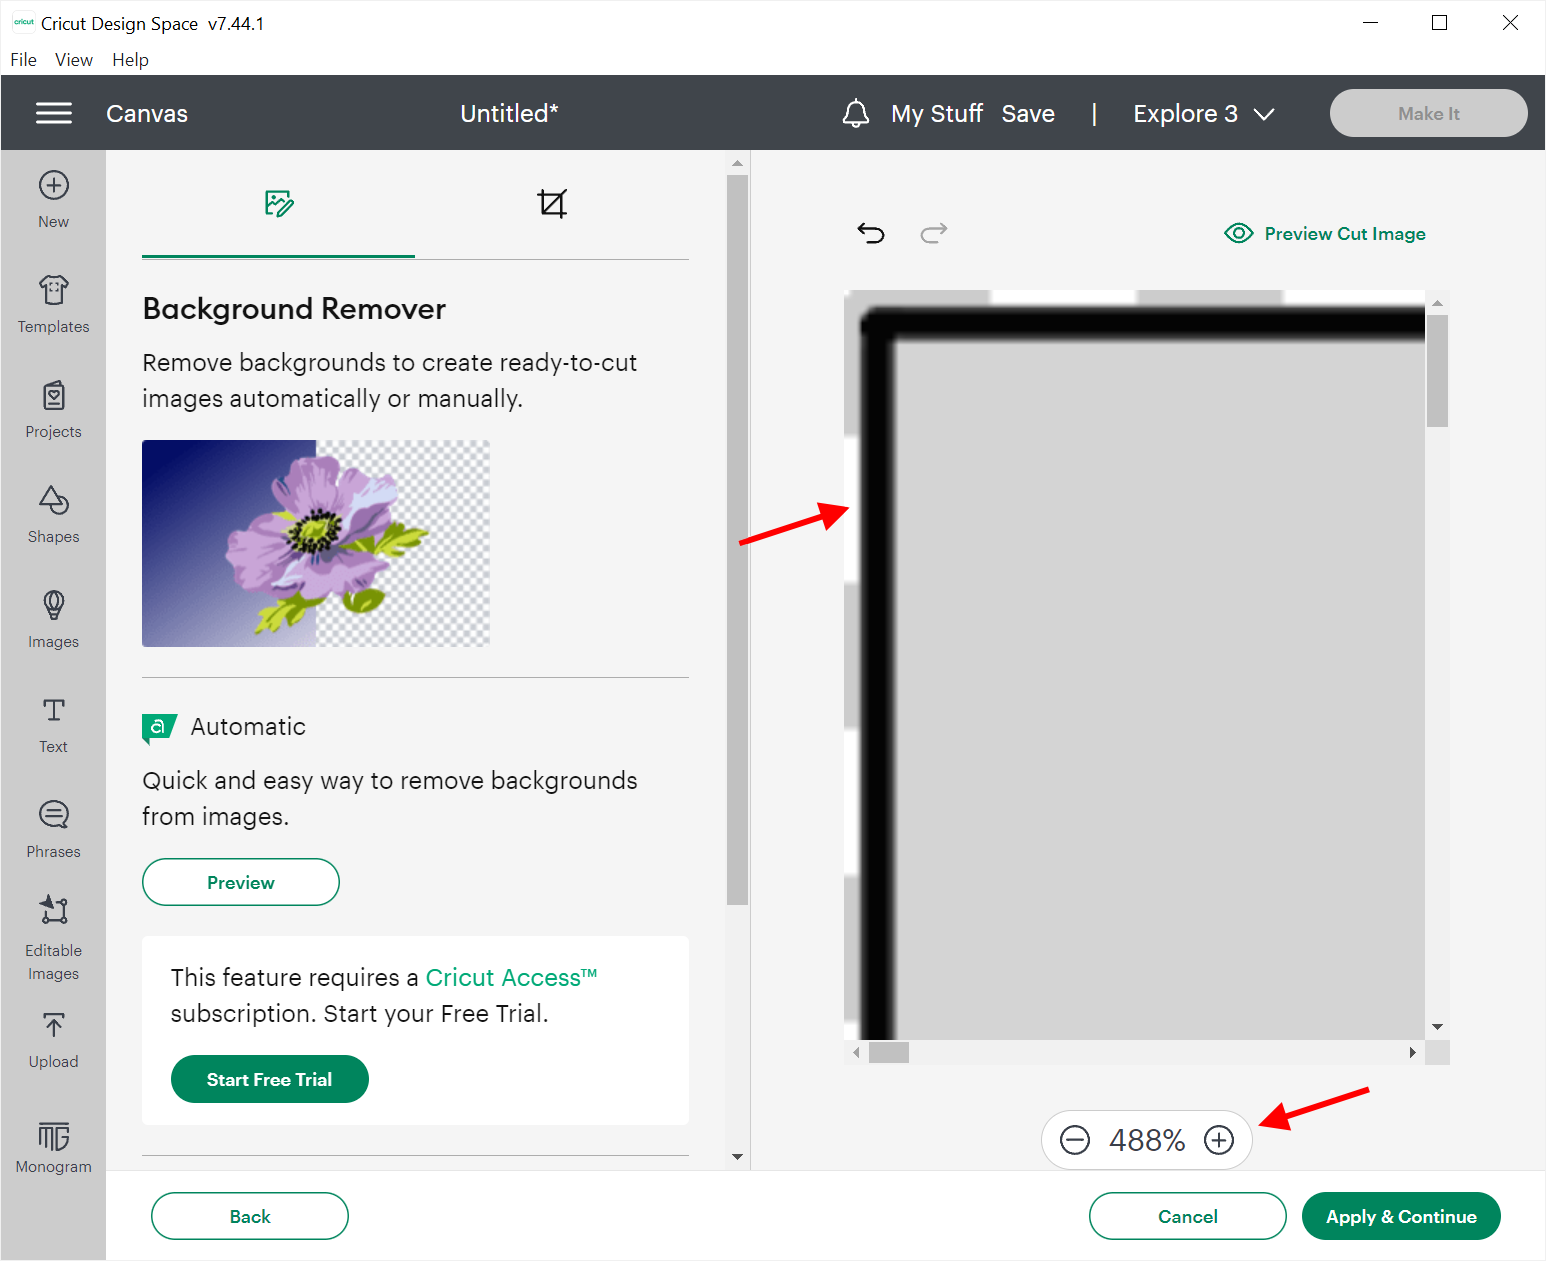
The next screen is where you remove the background color. You exported with no piece colors, so you might think this step is unnecessary, but CDS has provided a gray filler and you'll need to turn that gray to clear. There are two ways to do this. If you have a Cricut Access subscription then the software will do it for you. If you don't, you'll have to click once in each piece and also in any border area surrounding your design, even if that border is very thin. In the Flag example, you'll have to zoom in quite a bit to see the border around the design so that you can click on it. Turning the border clear is essential to getting precise sizing, so don't forget to do it! Below you'll see that we've zoomed in to 488%, which reveals the thin border around the design. Click on this border to turn it clear, then zoom back out to show the entire design again.
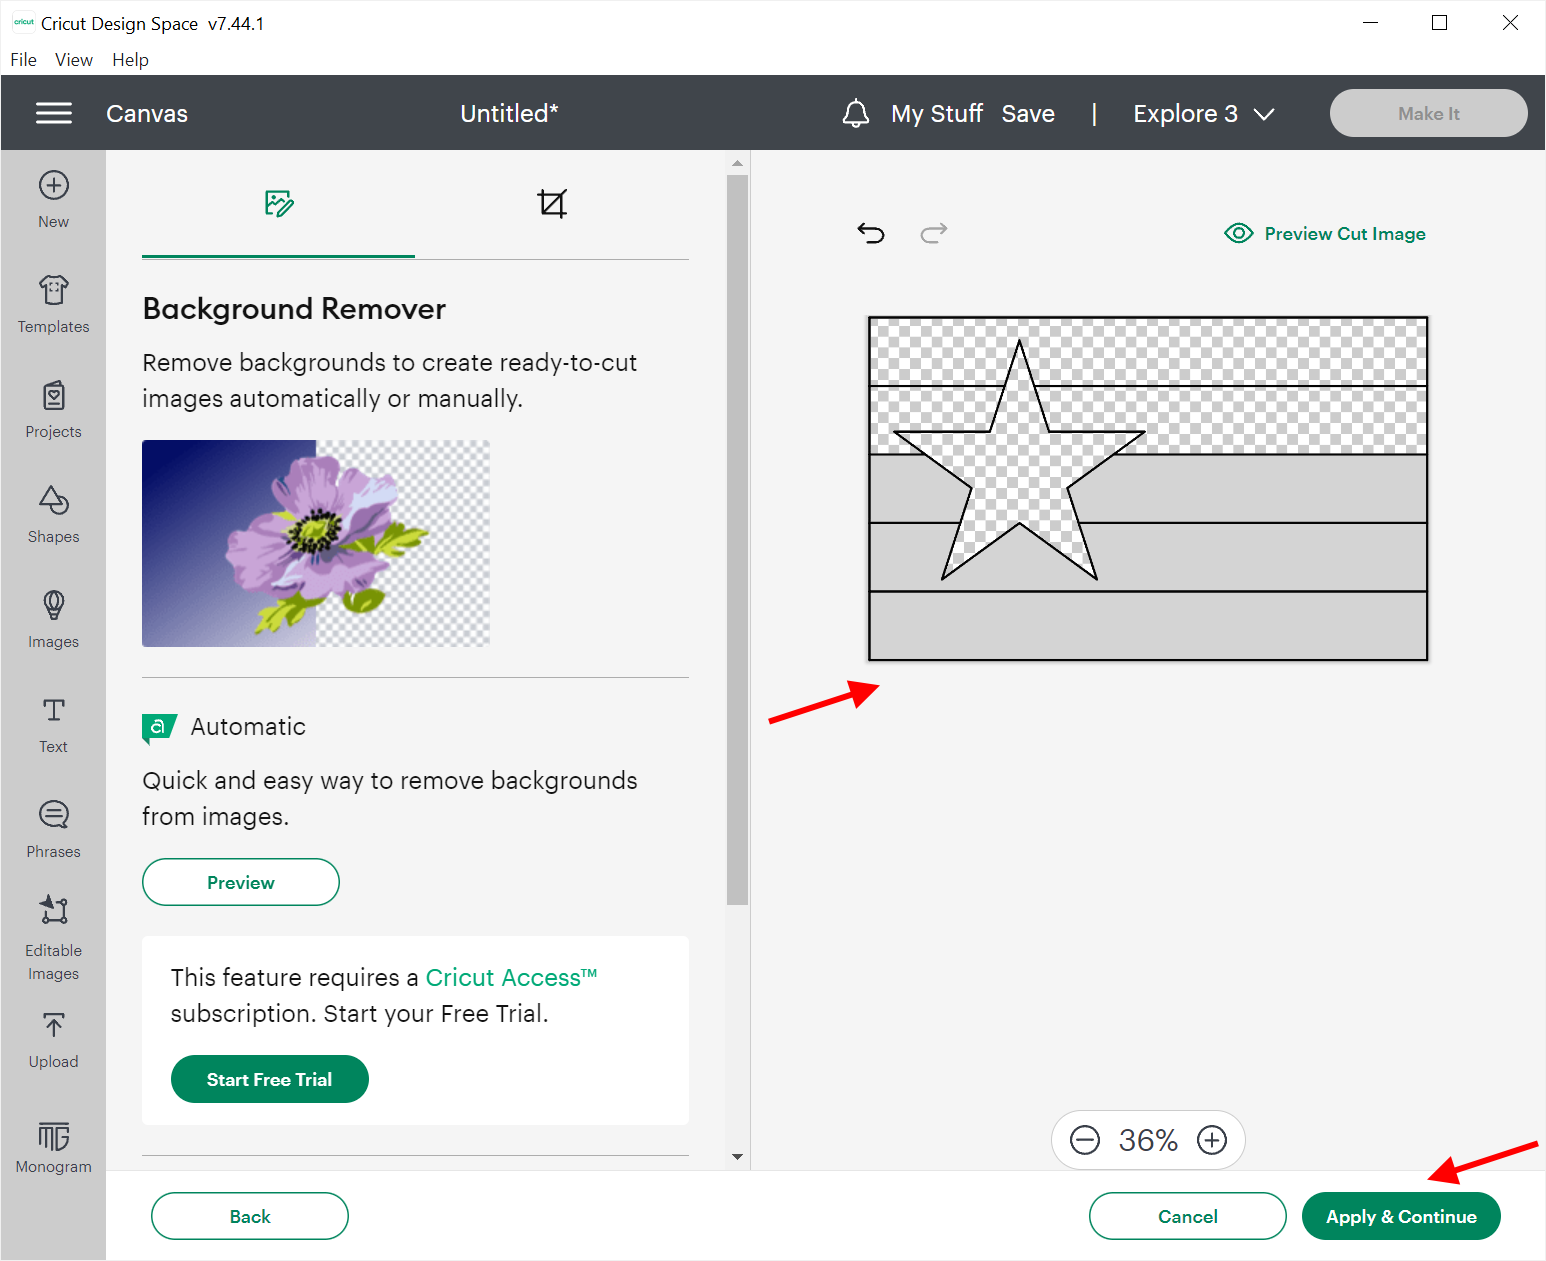
Below you see our flag design midway through the background removal process, with "clear" indicated as a checkerboard pattern. After you've turned all gray areas to clear, click the "Apply & Continue" button at the bottom of the screen.
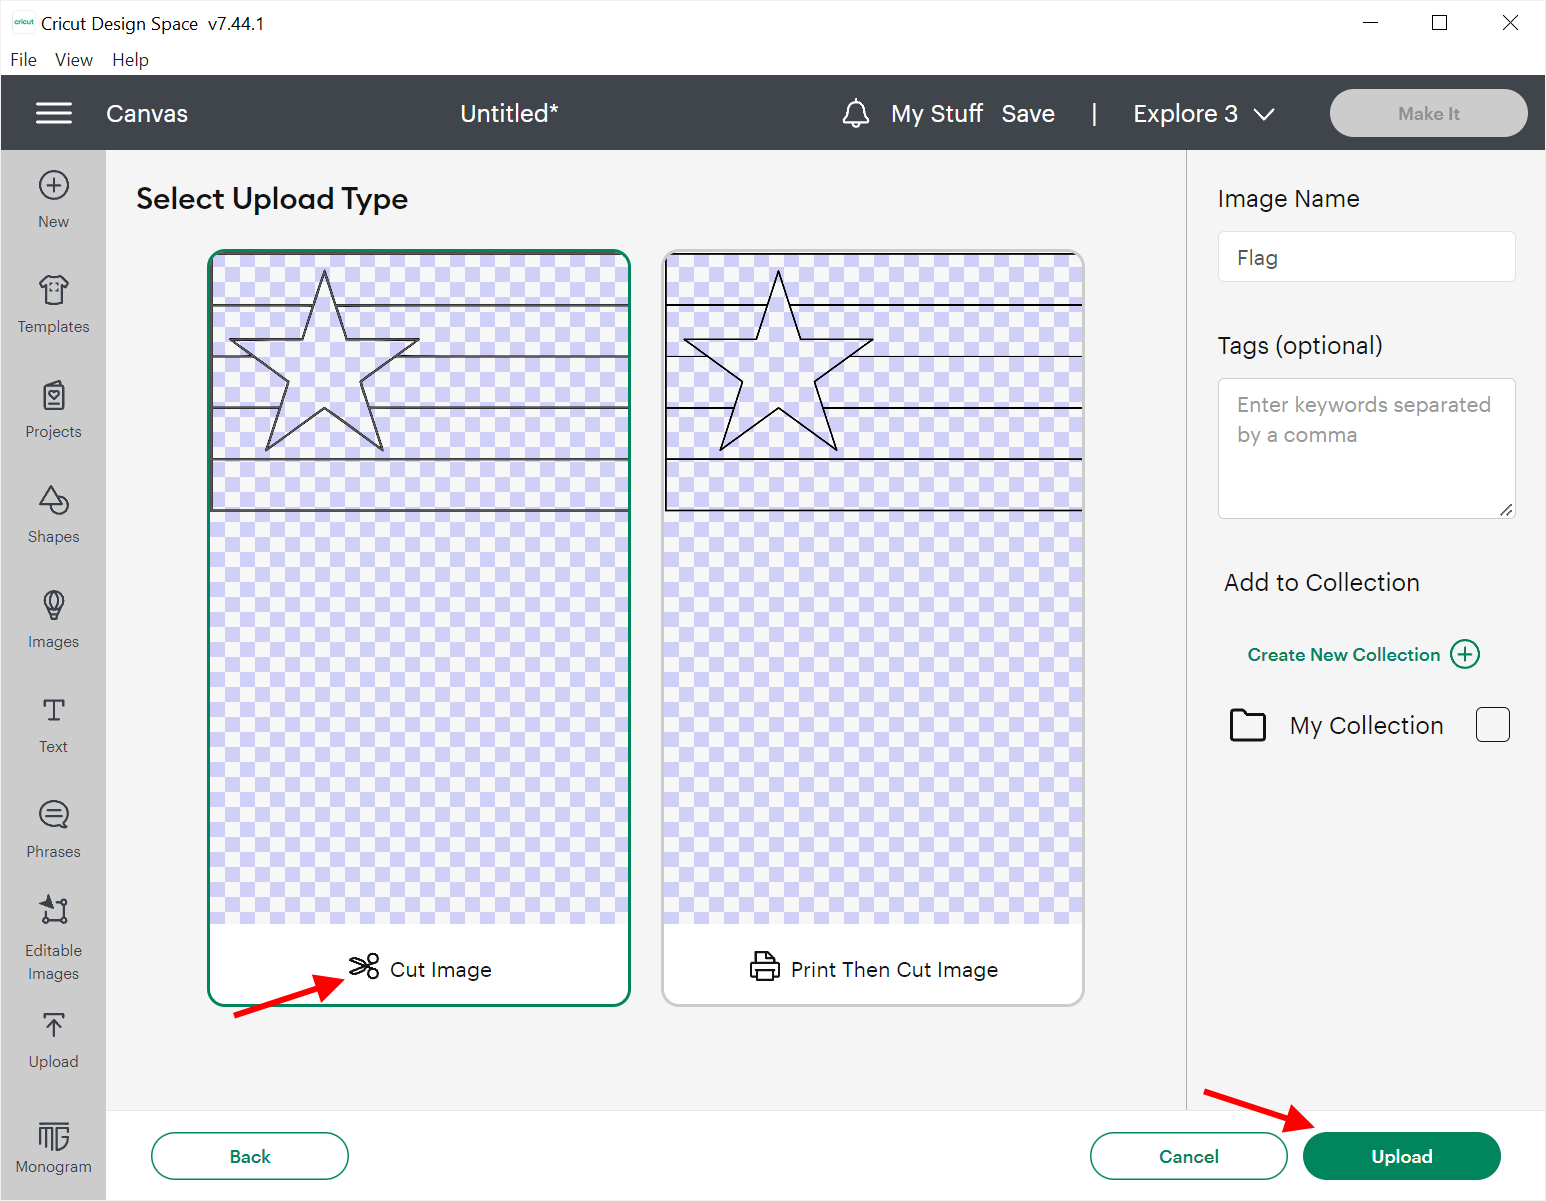
On the next screen, choose the "Cut Image" option (on the left). If you wish, change the image name, add keywords, or specify a collection for your image. Click the "Upload" button at the bottom when ready.
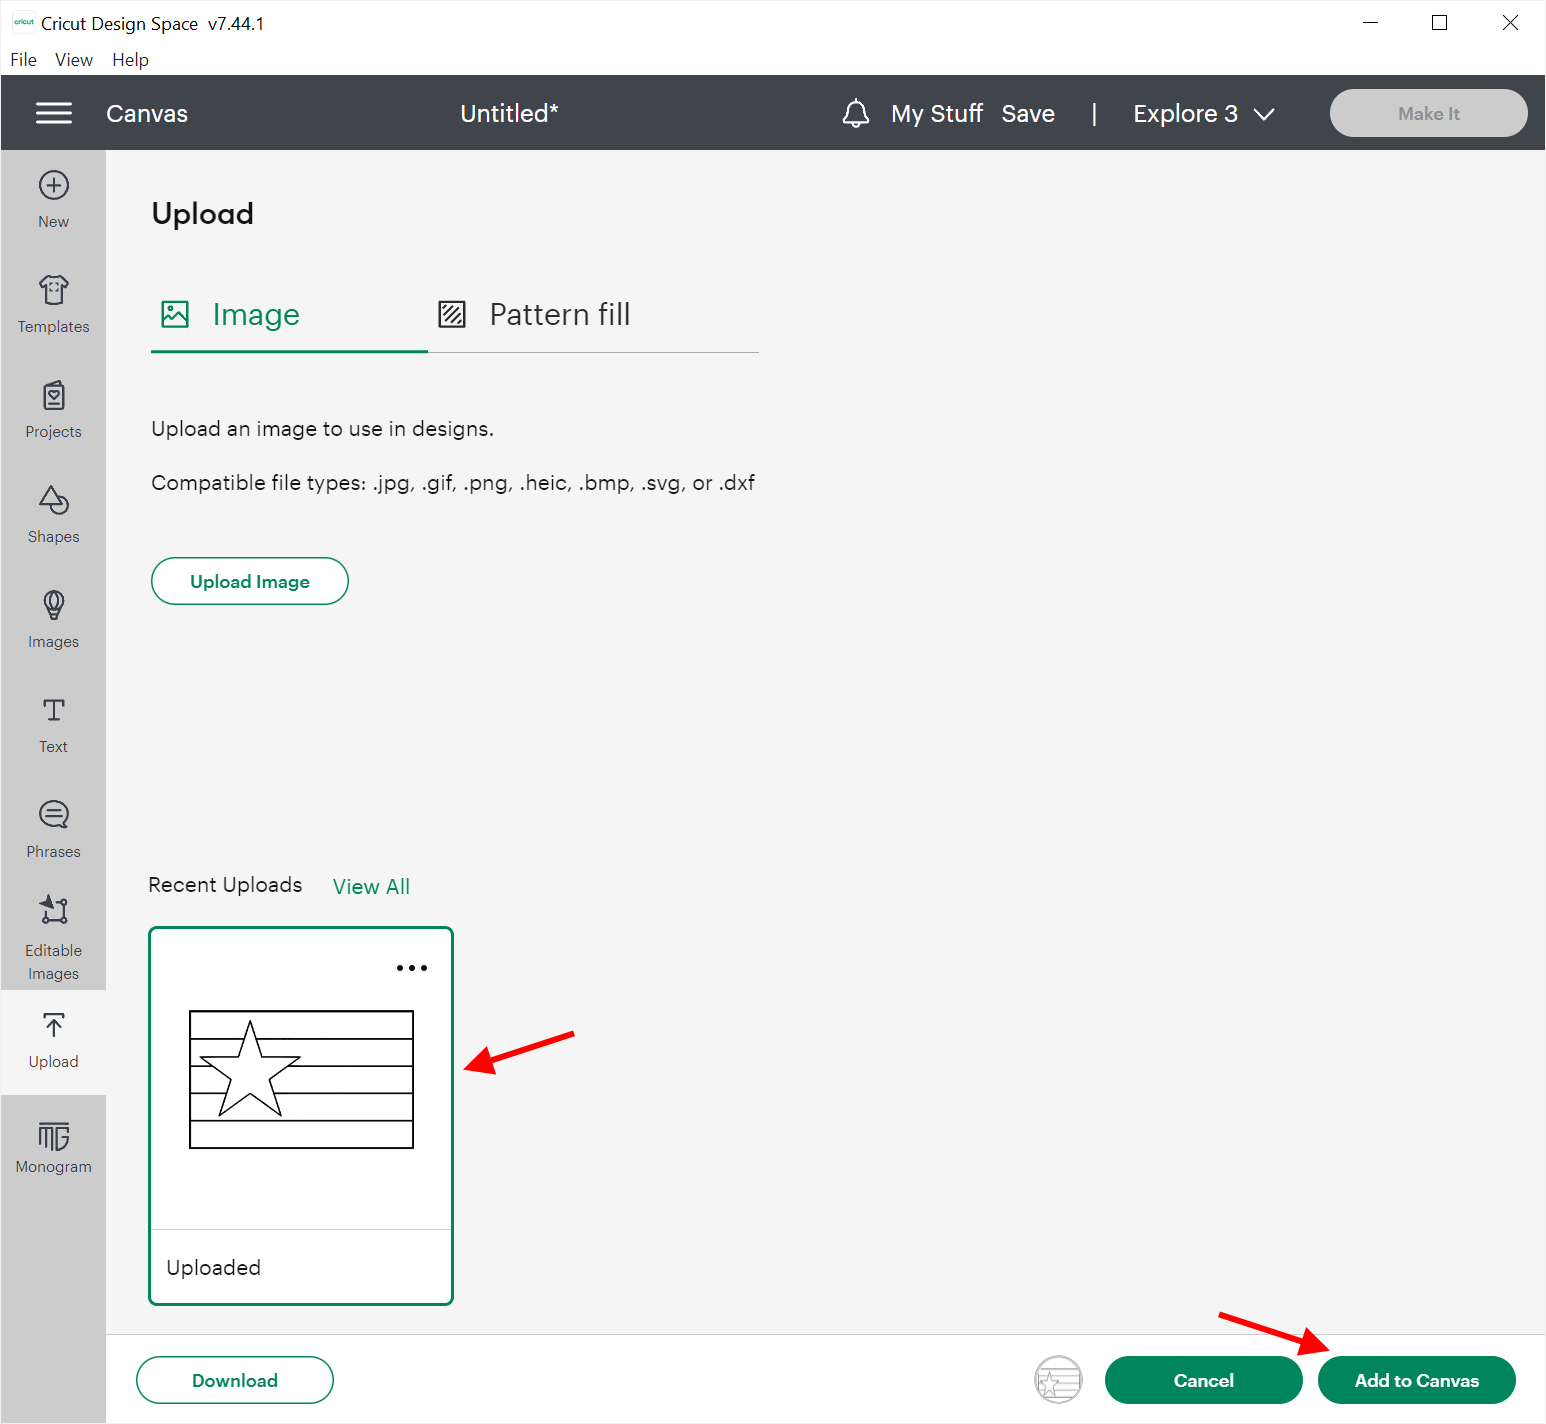
You should now see your image among the recent uploads. Click on it to select it, then click the "Add to Canvas" button at the bottom.
Next you'll see a CDS canvas containing your image. At the bottom of your image you'll see its size. This is the total size of your image, which is different from the size in Glass Eye 2000 because here the size includes the line widths. If you exported at 72 DPI, your image will be correctly sized.
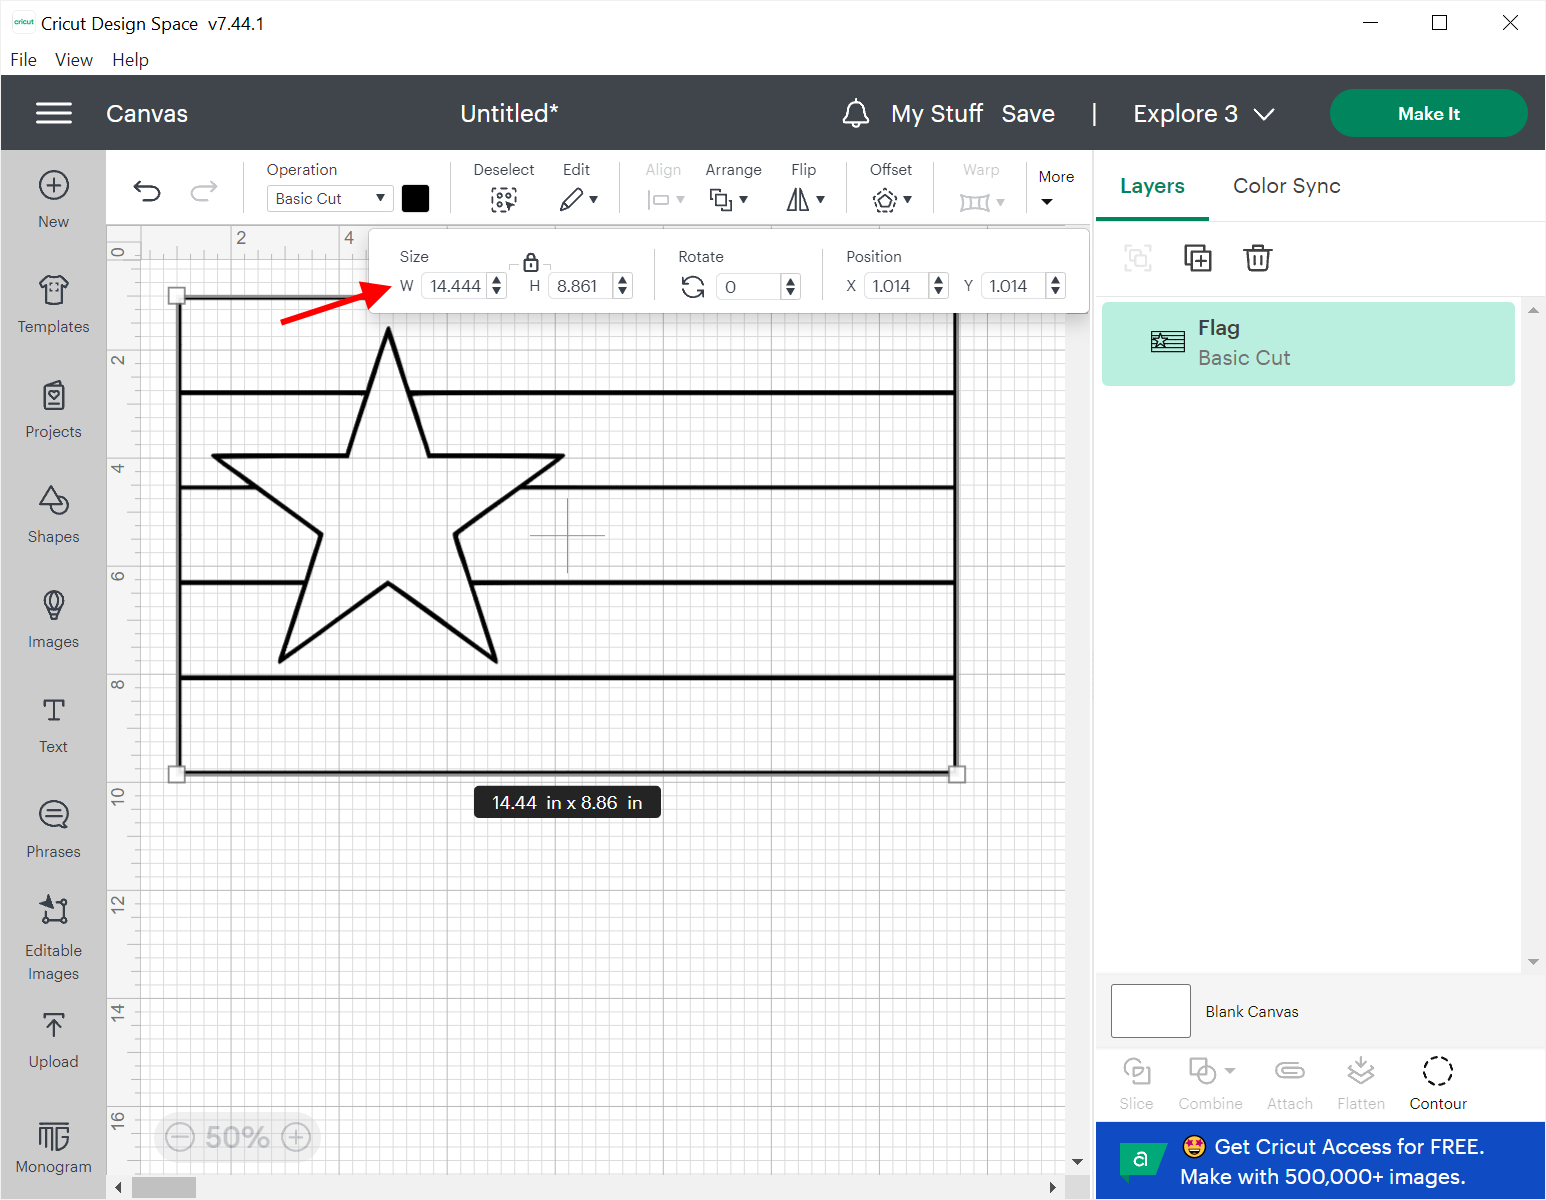
In our example, we use the "More" button on the CDS toolbar to show width and height to 1/1000″. You'll see that it shows 14.444″ × 8.861″. Let's verify that this is the correct size. Looking back to the first image on this page, we see that Glass Eye 2000 reports the design size as 14.373″ × 8.8″ measuring midline to midline. Our heart thickness is a consistent 1/16″ = 0.0625″. Therefore, in CDS we would expect a width of 14.373″ + 0.0625″ = 14.4355″ and a height of 8.8″ + 0.0625″ = 8.8625″. This expectation is within 1/100″ of CDS's calcuation so the size of our import should be acceptably accurate.
For those of you with Glass Eye 2000 Standard Edition, where your exports are unlikely to be at 72 DPI, you can now compensate by using those same size controls. Get the width and height of your design from Glass Eye 2000 and then add in your heart thickness to each value. If you need precision sizing in CDS and don't want to bother with manual calcuations, consider upgrading to the Professional Edition.